Chat Interaction
The Flatlogic AI chatbot will guide you in creating your own application. Below is a step-by-step guide to help you through each stage of building your website.
1. Set the Application Name and Domain
Start by providing a name for your application and a domain name. The system will suggest an available domain name, or you can propose your own, which will be automatically checked for availability.

2. Describe Your Application
In the first chat step, describe how you envision your application.
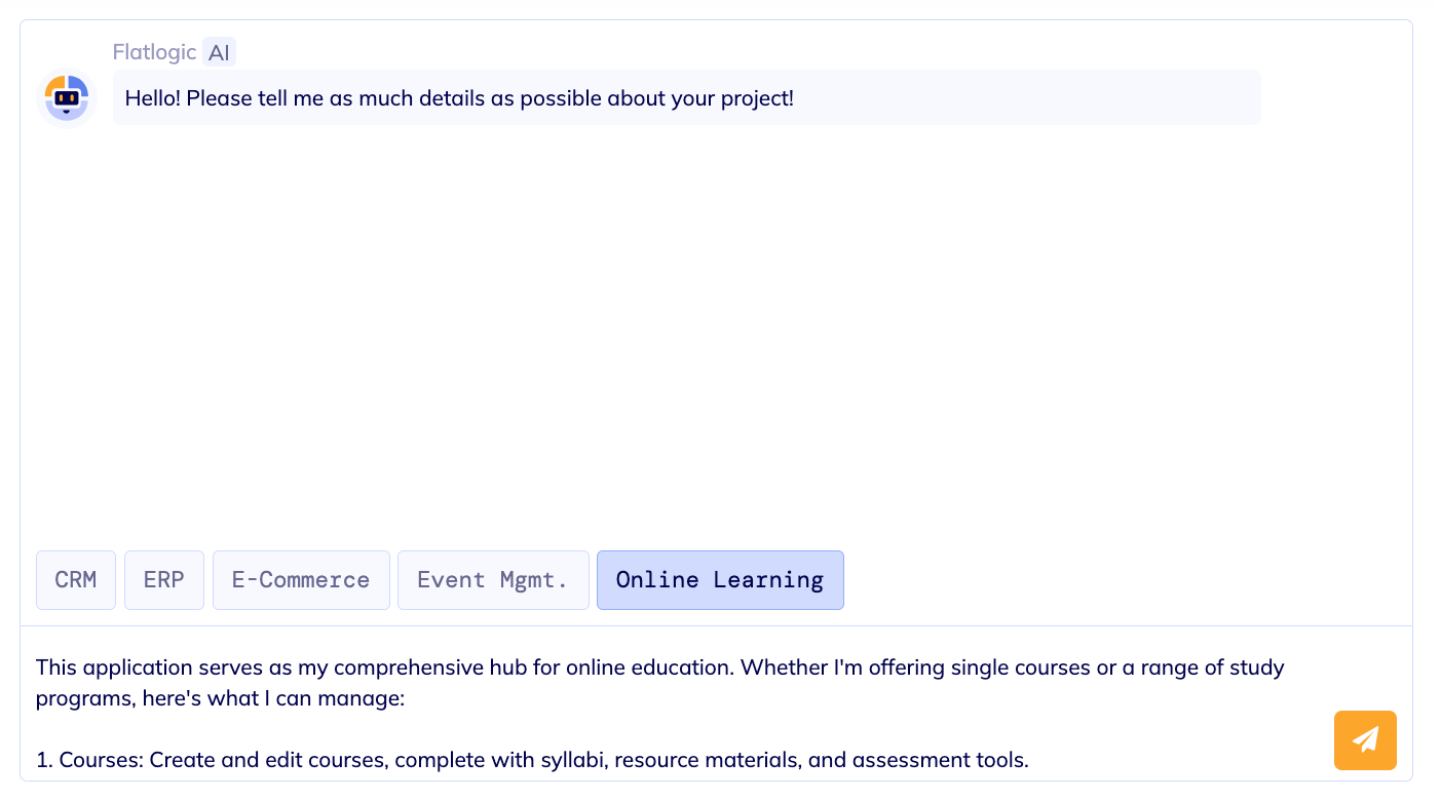
Here you need to decide what the platform type will be. You can either provide a detailed description of your vision or choose any of our templates. The chatbot offers five options. Click any option to get more info with examples. You can further customize the description to match your project.
CRM (Customer Relationship Management): A tool for managing customer interactions, sales, and support.
ERP (Enterprise Resource Planning): A system for automating and integrating core business processes like finance and HR.
E-commerce: A platform for selling products or services online, including payment and inventory management.
Event Management: Software for organizing events, registrations, and schedules.
Online Learning: A platform for delivering courses, tracking progress, and managing educational content.
3. Provide a Ready-Made Schema (Optional)
If you have an existing application schema, you can share it with the chatbot. Copy the description into the chat or upload an .sql file.
Flatlogic AI will create the schema based on your input, automatically adding the entities users, permissions, and roles. While you can remove permissions and roles (though not recommended), the users entity cannot be deleted.
No matter how the schema was created (generated or imported), make sure to review it thoroughly, including all relationships, entities, and other details, to ensure it meets your requirements.
4. Define User Roles
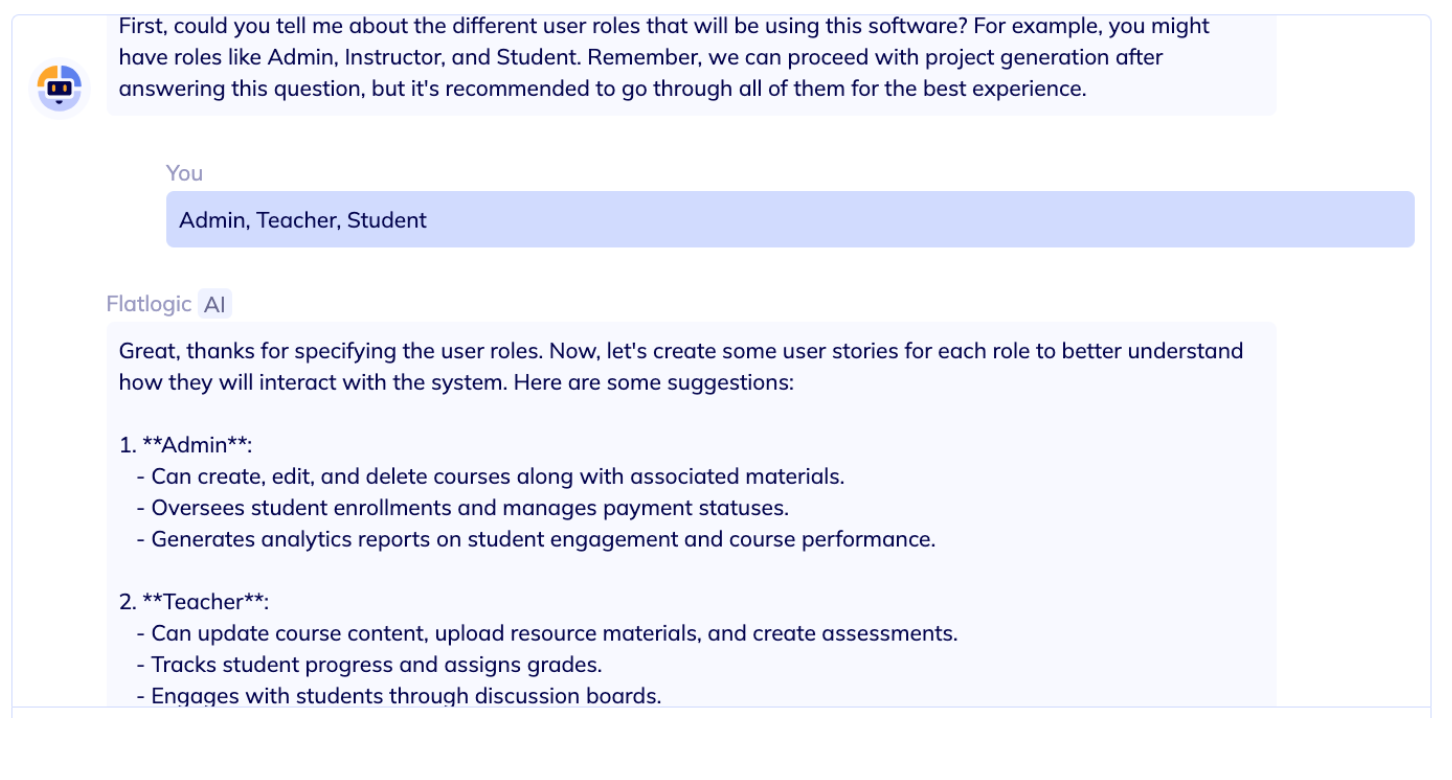
Next, the chatbot will ask you to define user roles, which determine access levels for users. For example, if creating an educational platform, roles might include:
Administrator: Full access to all data (read, create, edit, delete).
Teacher: Can add and edit content.
Student: Can only view content.
Once roles are defined, you’ll need to outline user stories for each role. The chatbot will suggest examples, or you can provide your own.
5. Enable Multitenancy (Optional)
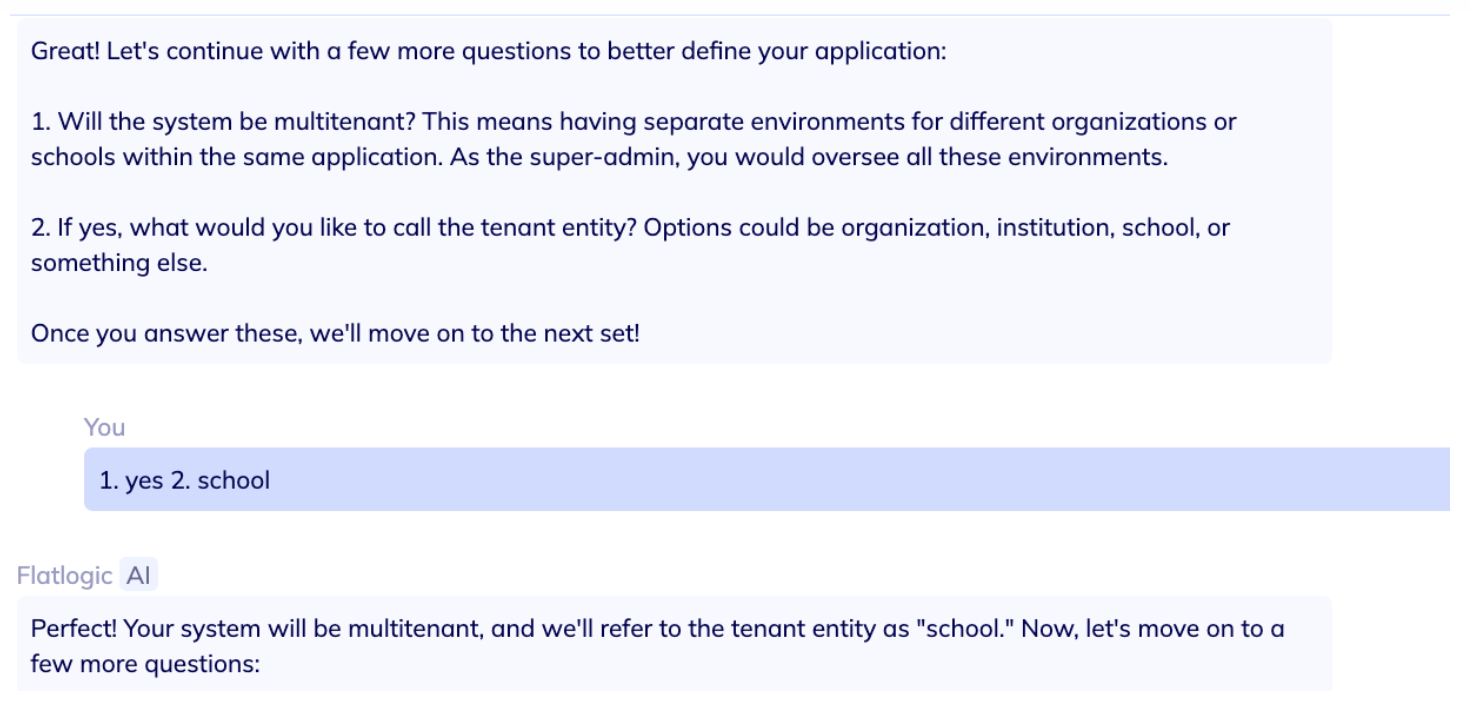
Decide if you want to enable multitenancy, which allows multiple independent organizations to exist within a single application, each with its own isolated data. Multitenancy is a software architecture where a single application serves multiple tenants, isolating their data and configurations. For instance, a healthcare app might let each clinic manage its own doctors, patients, and appointments separately.
6. Choose the Interface
The chatbot will suggest interface options tailored to your selected application type. You can choose one now and adjust it later if needed.

7. Automate Processes and Integrate Services
The chatbot will offer automation options and ask if you’d like to integrate third-party services (e.g., payment systems, calendars). Simply provide the names of the services you want to use.

8. Select a Design
Choose a design from the options provided by the chatbot. If you skip this step, a random design will be selected, which you can change later.

9. Generate Your App
After completing all steps, click Generate your app. Ensure you have provided the application name and domain before proceeding.
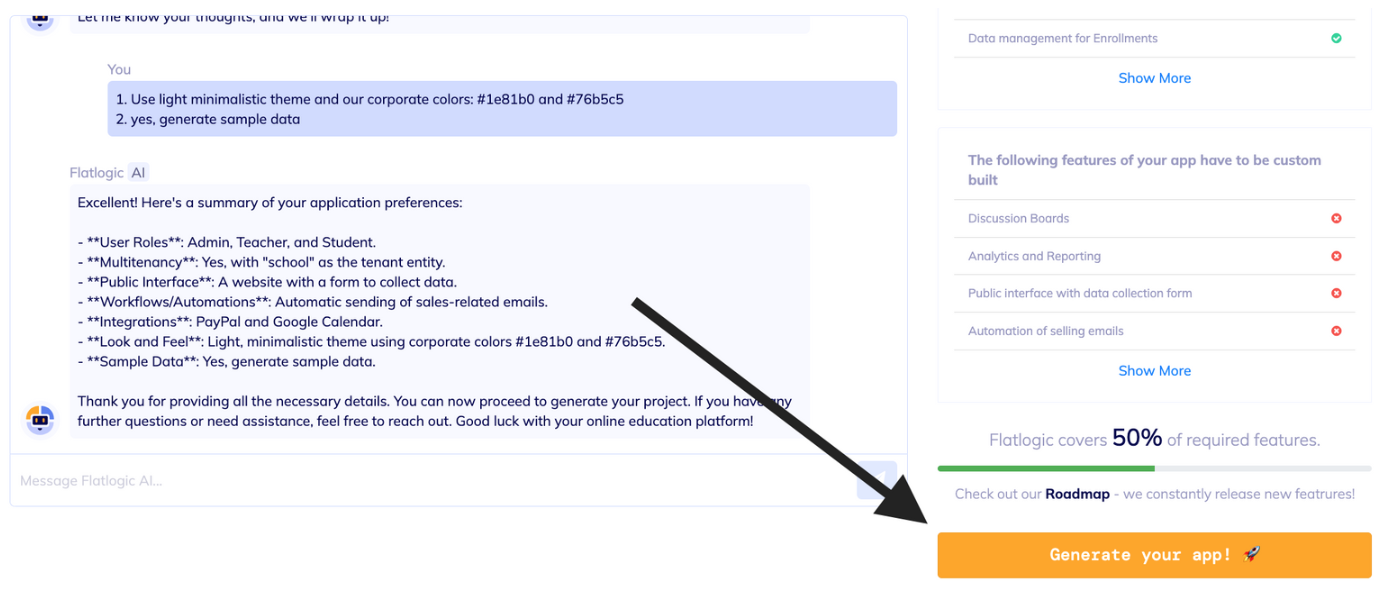
The progress bar reflects the amount of information gathered by the chatbot. Typically, the minimum required data is collected after just three questions. However, you are always welcome to enhance your description and provide Flatlogic AI with more details about your application at any step.

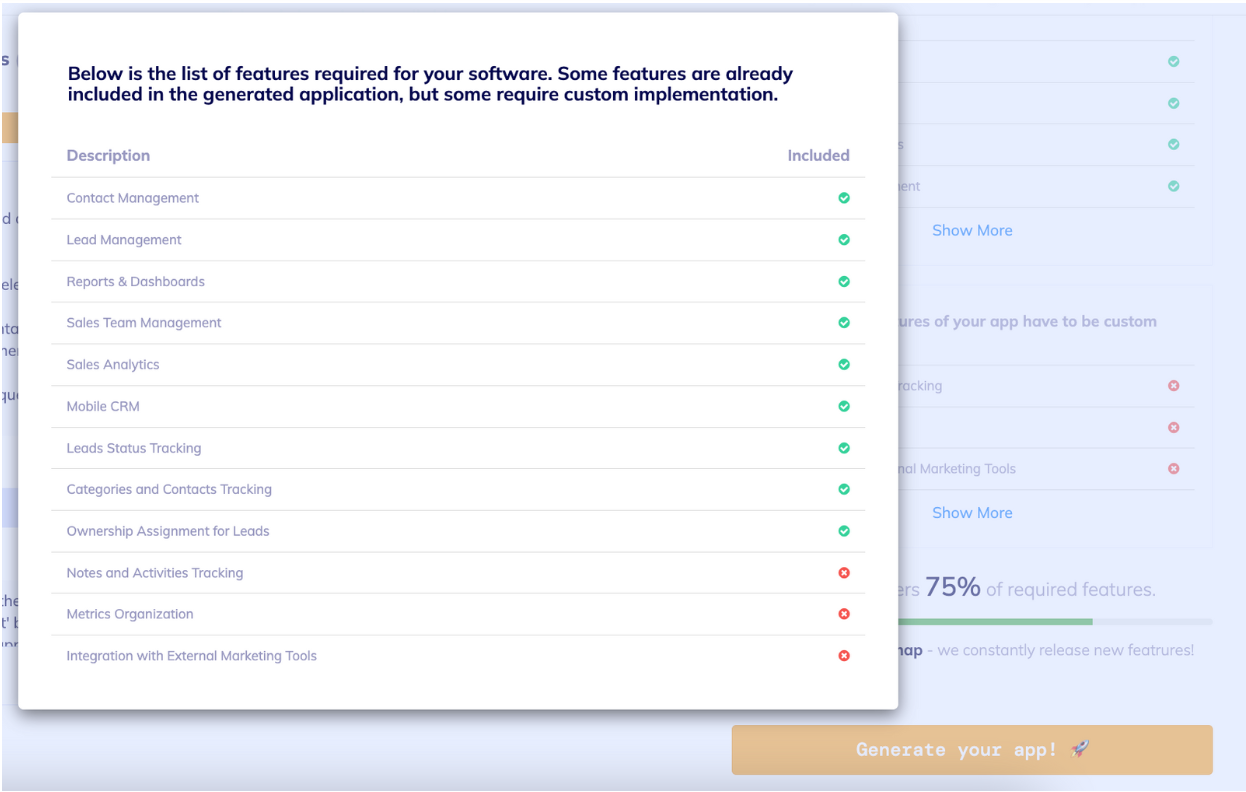
When you provide the chat with a description of your project, it will display a list of features that will already be included in your application, as well as those that can be added separately.
After clicking the Generate your app! button, you'll see the process of creating your project. Once it's complete, you'll be directed to the Step 2 page, where you can review your schema and make any necessary adjustments.