Roles and Permissions-Based Access Control
Roles and Permissions feature lets you customize access for each user based on their role, improving efficiency, user experience, and security.
So for now, you can separate business logic by roles and permissions, in other words, you may define what users can do within the system based on their role and permissions.
As an admin of the application, you may define what parts of the system are accessible by other user roles.
How it works?
Firstly, you need to sign in to our platform and create a new application. Please follow the standard app creation process.
At step 2, select Next.js/Tailwind stack. At the moment the roles and permissions feature is only available for this particular stack!
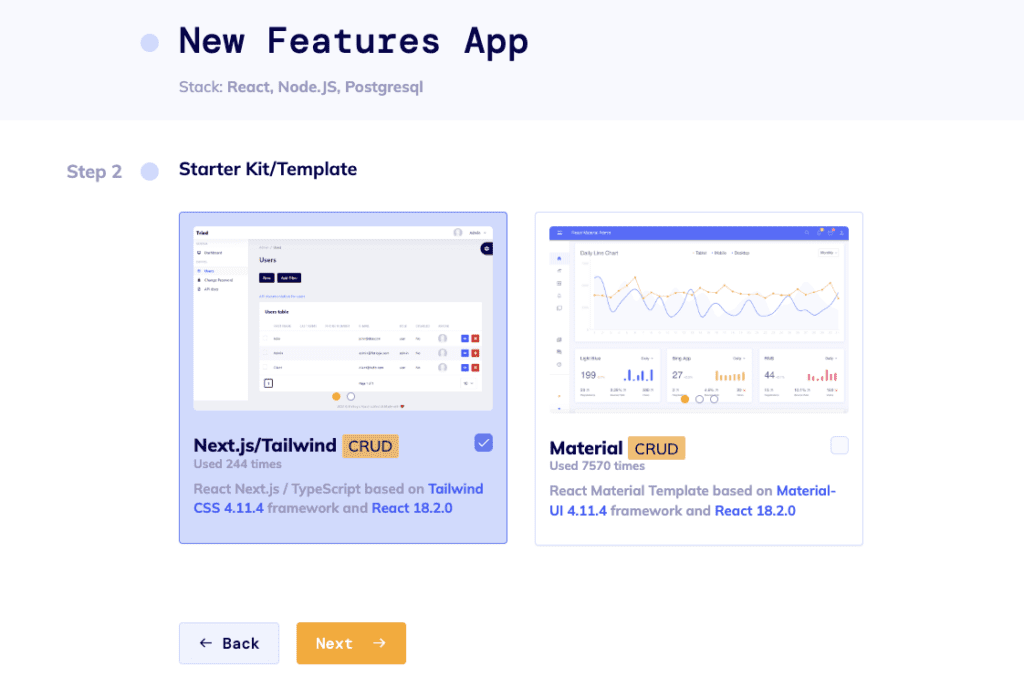
Image 1 – Starter Kit/Template Selection
The next step in the process is to design a schema for your application. The Roles and Permissions are added by default. You will immediately see 3 entities in your schema: users, roles, and permissions. They are built-in system entities. Furthermore, roles and permissions are automatically set up for user entities. If you don’t need the Roles and Permissions entities, simply click on the 3 dots next to the Add Entity button and deselect Roles and Permissions.
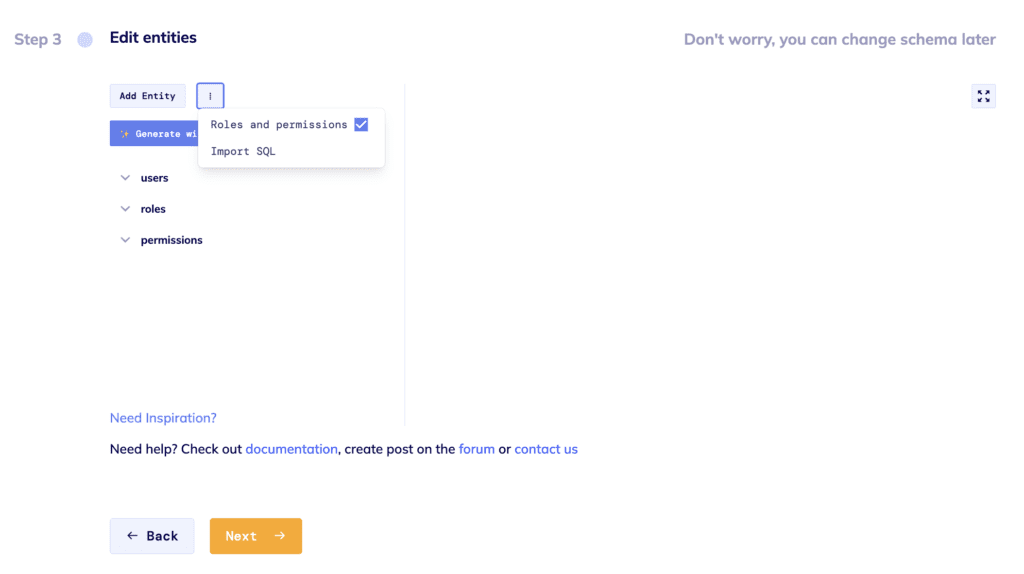
Image 2 – Shema Editor. Roles & Permissions Entities.
Next, you can connect your GitHub and push your application code there. Or skip this step by clicking the Finish and Deploy button and in a few minutes, your application will be generated.
The generated app comes with a built-in Super Admin user [email protected]
Roles
As a Super Admin, you can see the Roles and Permissions sections in the app. There you can create custom permissions for your application and assign them to specific roles as needed.
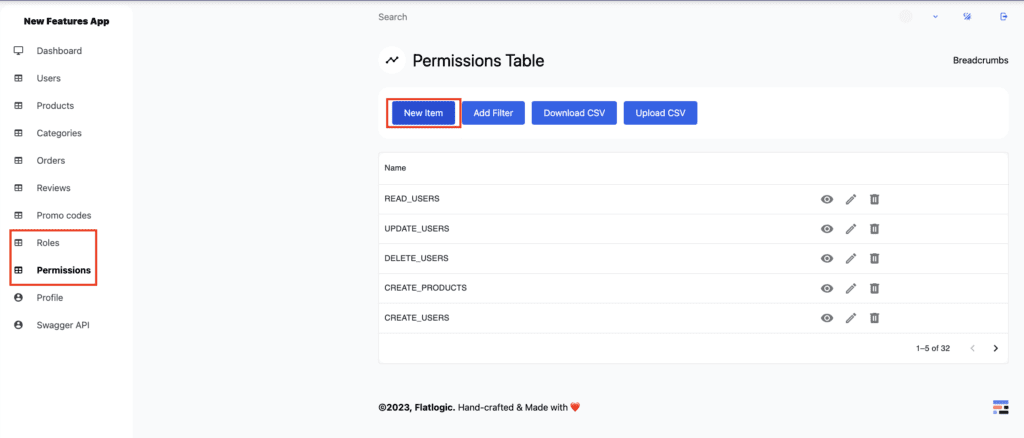
Image 3 – Super Admins Panel. Permissions Table
Next, go to the roles pages. Roles page contains all roles present in the application. By default the roles are: Administrator and User. Administrator has all permissions, and hence able to do whatever they want. User by default has all permissions, except those needed to manage roles, permissions, and users. You can try logging in with Admin and User to see the difference.
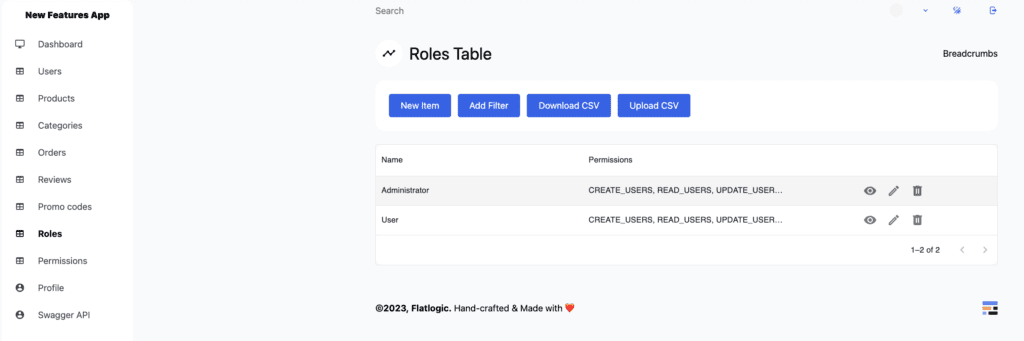
Image 4 – Super Admins Panel. Roles Table
Permissions
As an Administrator, you can also go to the list of permissions.
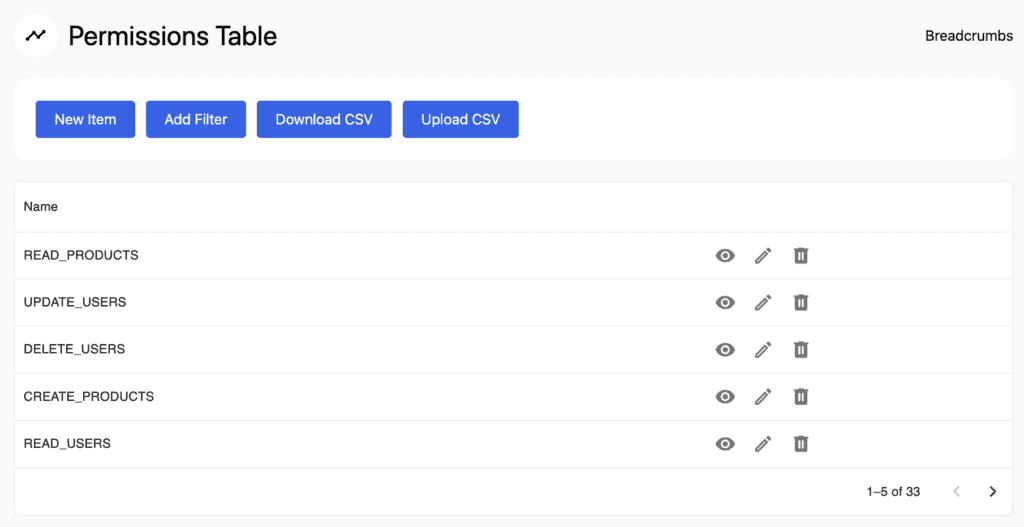
Image 5 – Default Auto-generated Permissions
In the Permissions table, you can see the default CRUD permissions. For a user, to access certain parts of the app they need to have specific permission. The list of auto-generated permissions includes:
- CREATE_
, to add new entries. - READ_
, to retrieve, search, or view existing entries. - DELETE_
, to deactivate, or remove existing entries - UPDATE_
, to edit existing entries.
Custom Permissions
You can also assign custom permissions to the specific user. To view the permissions assigned to individual users, navigate to the user table, select the user you want to review, and click the eye icon. This action displays all user-related settings. To assign custom permissions to a specific user, go into user edit mode and select the desired permissions in the Custom Permissions section. Now this user has custom permissions, besides standard ones assigned via their role.
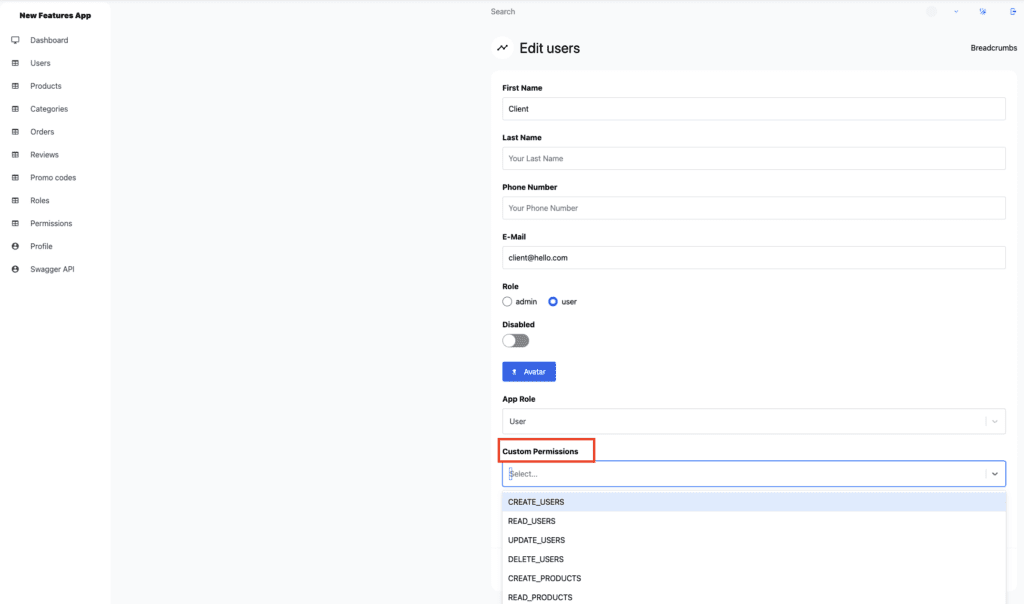
Image 6 – Custom Permissions
Code
In our ongoing efforts to ensure data security and enhance user accessibility, we have implemented a permissions middleware. This feature manages access on both the front-end – the part of the website that users interact with directly – and the back-end, where data is stored and handled.
This middleware is all about managing access to certain features or data of a website, or in tech terminology, “user permissions”. Essentially, it’s like a website security guard checking if a user has the right ‘pass’ to perform certain tasks or access certain information.
In our Back-end, user permissions act like ‘passes’ to access certain areas or perform specific tasks. When users interact with the data, a specific ‘pass’ or permission is required.
The system checks if a user carries the necessary pass. If not, it moves along to inspect their assigned role – think ‘Administrator’ or ‘User.’ The ‘Administrator’ role comes with broader passes, allowing the Admin User to venture where other users can’t.
Missions relating to database actions like creating, reading, updating, or deleting data get special treatment. Here, the system closely examines the user’s request, maps it to the respective database action, and thoroughly checks if the user holds a proper ‘pass’ to carry it out.
Here is the example of a permission check, for each route, performed on the backend, in this case, it will be “/categories”:
router.use(checkCrudPermissions('categories'));
On the Front-end side we are checking if a specific user has a certain permission, be it one permission or a set of permissions.
- If the user doesn’t have a role assigned to them, the function immediately returns
false, meaning the user doesn’t have permission. - We are creating a set – a collection of distinct items – of permission names that the user has, combining their custom permissions and the permissions included in their role.
- If the
permission_nameinput is a single string, it checks whether this permission is in the set of permissions the user has, or if the user is an Administrator. If either condition is true, the function returnstrue. - If the
permission_nameinput is an array (meaning multiple permissions are required), the function checks if the user has at least one of these permissions in their set of permissions and if so, it returnstrue.
Here is an example of a permission check performed on front-end:
Every page is enclosed by the LayoutAuthenticated component, to which we pass our permission as a property:
CategoriesTablesPage.getLayout = function getLayout(page: ReactElement) {
  return (
    <LayoutAuthenticated permission={'READ CATEGORIES'}>
     {page}
    </LayoutAuthenticated>
  );
};
So this page is going to be accessible only if the user has READ_CATEGORIES permission.
Here is an example of how, within the LayoutAuthenticated component, we check if a user has permission to access a particular page. Method hasPermission is general and can be used anywhere:
useEffect (() => {
  if (!permission || !currentUser) return;
  if (!hasPermission (currentUser, permission)) router.push('/error');
}, [currentUser, permission]);