Introduction
Does your Laravel project need validation? You do not know how to implement validation, or look for best practices, right? You have come to the right address. Working with projects on Laravel (including code reviews), I came across different ways to implement validation. As I have seen, validation can be implemented by various methods which are not always correct in terms of SOLID principles and best practices. As a result, projects in which the validation logic is implemented incorrectly become even more problematic over time. The code is confusing, turning out to be a salad of different unrelated processes.
This article investigates the spectrum of validation methods in Laravel, covering a range of techniques from highly effective to frankly inadequate, providing a comprehensive overview essential for ensuring robust data integrity in business software development.
Amazing Laravel
I have to praise Laravel because I really love this framework. It is quite simple to learn and at the same time offers almost limitless possibilities. Laravel is a really wonderful MVC open-source PHP framework based on Symfony, developed over 10 years ago (July 2011) by Taylor Otwell. It found love and fame among web developers. Laravel has a huge community: meet Laracast and Laravel Forums. This month, on February 9, 2022, the next online Laracon began, the largest developer conference on Laravel.
Many popular websites have been written with Laravel. Among them are the large eLearning platform Alison.com (more than 4,000,000 monthly visitors according to similarweb), the leading portal for financial experts https://www.barchart.com, and also Laravel MVC framework is used by fedex.com, weibo.com (?), podium.com, and many others platforms (according to buildwith.com data).
Among other things, it is worth noting that Laravel takes 1st place in the Github Top PHP ranking, and Laravel based October CMS (Content Management System, written with Laravel) is the second-most-starred PHP CMS repository hosted on GitHub (July 2021 data).

So, we have already begun to study Laravel and how it works in the previous article What is Laravel, and today in this Guide we will study How Laravel Validation works. We will learn 4 different and excellent ways of Validation in Laravel. You can use each of these Laravel Validation methods in your projects. As mentioned earlier, some of these methods are not the best practices, however, I believe that you should be aware of them to use them at your discretion.
How Laravel Validation works
- Firstly, we will learn Laravel Validation In Route (I know, this is the worst solution, but I think you need to know that it exists.)
- Secondly, we will learn the “Classic” method: Immediate Laravel Validation in the Controller
- Thirdly, we will learn the best practice method: Laravel Validation with Form Requests
- Fourthly, we will learn the geek method: Custom Laravel Validation using Laravel Validator
After that, we’ll talk about Custom Rule Classes, about Custom Laravel Validation Messages, and at the end of the article, we’ll look at the most popular ready-to-use rules that you can use for validation of your Laravel projects.
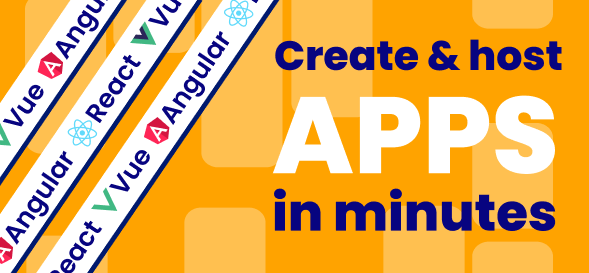
Also in this article, you will learn how to save up to $20,000 using a ready-made solution from Flatlogic Platform: in a few clicks, we will deploy a Laravel Project with a Vue front-end (Angular and React front-ends are also available).
If you want even more features, then at the end of the article I will present a promo code for a Flatlogic Platform subscription, where you can test the incredible features of the platform. In a few clicks, you can not only create Laravel backend & Frontend (Vue, Angular, React) but also get a ready-made admin panel (various design options are available), a database and hosting.
So, enjoy reading. Let’s go.
Installation of Laravel
You can skip this paragraph if your Laravel project is already installed
There are many awesome ways to install your Laravel project, but we will focus on two of my favorites that work flawlessly.
- Laravel installation via Composer
- Laravel installation via Flatlogic Platform
Laravel Installation via Composer
The most popular and rock star way to set up your Laravel project. Just open the folder where you are going to work, start a new terminal and ask Composer to do the magic 🙂
composer create-project laravel/laravel laravel-validation(I chose the name for my project “laravel-validation”, but you can use whatever name you want)
So, let’s dive into the project:
cd laravel-validationAnd ask Artizan to start the Development Server:
php artisan serveVoila, Artizan thought a little and complied with the request. Fantastic!
Starting Laravel development server: http://127.0.0.1:8000ATTENTION: The development server is running on port 8000. Bear this in mind when you open your project in a browser on your local machine.
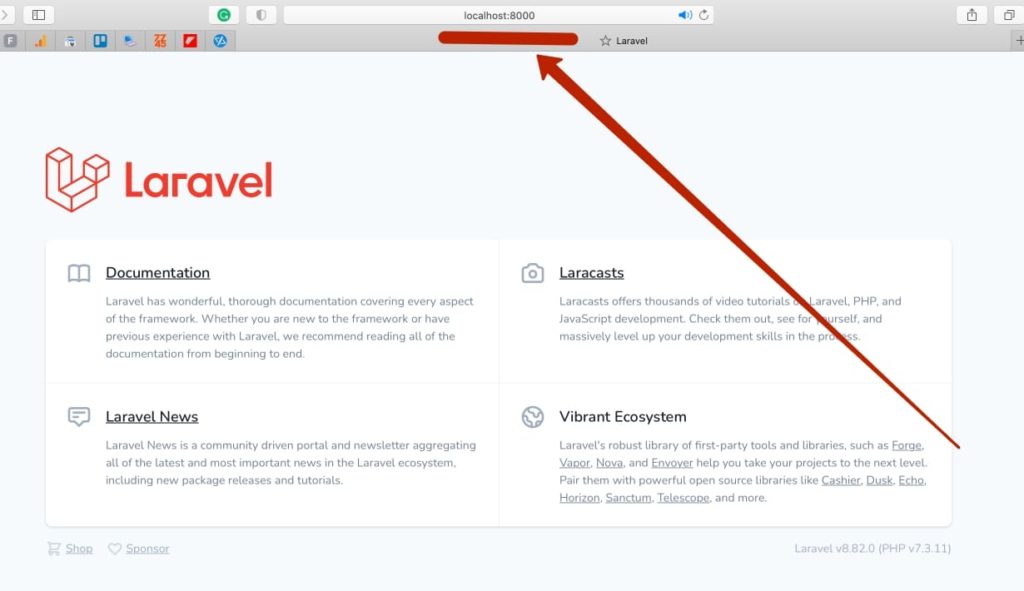
So, open localhost:8000 and see a working project with the default page:
Laravel Installation via Flatlogic Platform
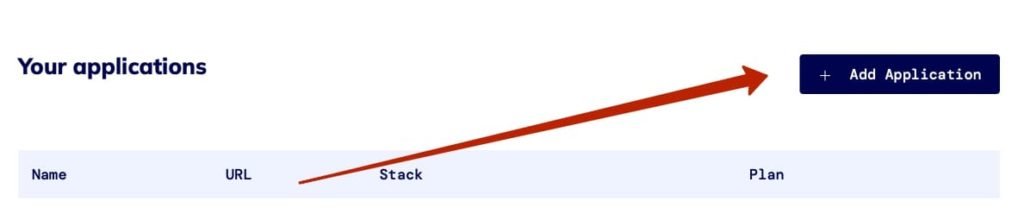
Same easy to install Laravel, using the Flatlogic Platform. But in this case, we will get more ready-to-use solutions. Soon you will be able to verify this. Complete a simple registration here https://flatlogic.com/users/sign_in and then go to the Admin Panel in your account and click Add Application
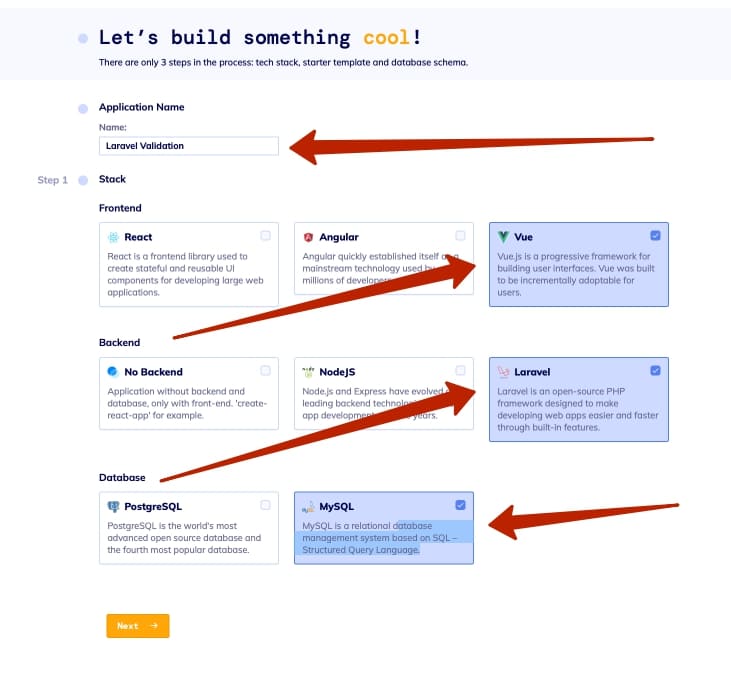
Next, come up with a name for your project (I chose Laravel Validation) and select the stack you want to work on. Click NEXT
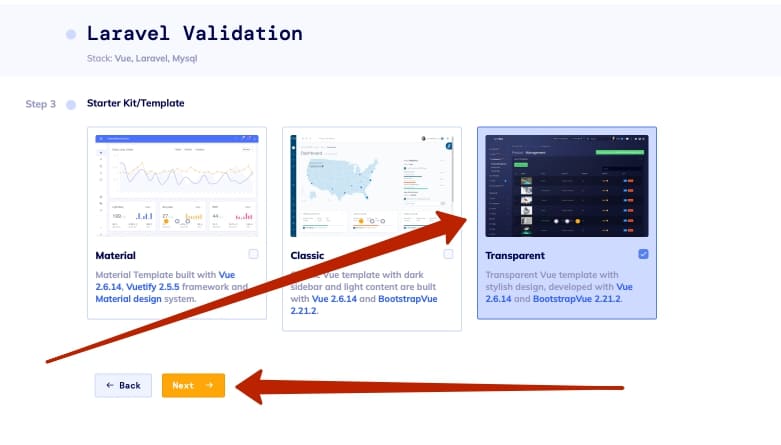
Choose a ready-to-use Admin theme for your future admin panel. I really like Dark Mode, so I chose a dark admin template.
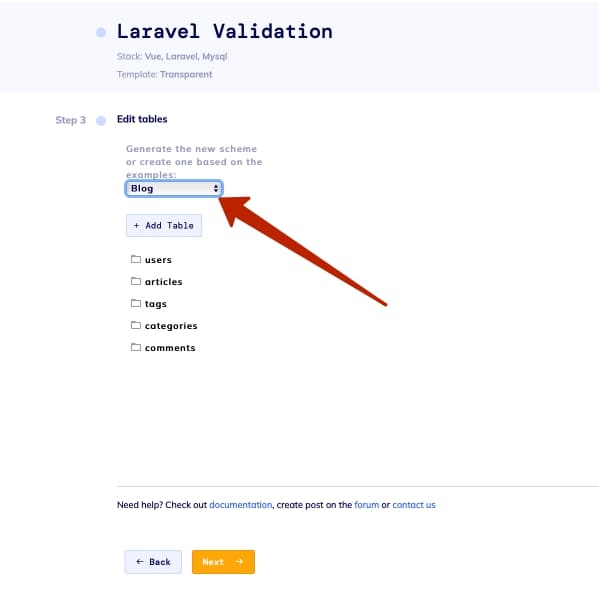
Next, select a ready-to-use Database Schema or invent your own. I chose the ready-to-use Blog schema. Dependencies are already established in this scheme and data types are registered.
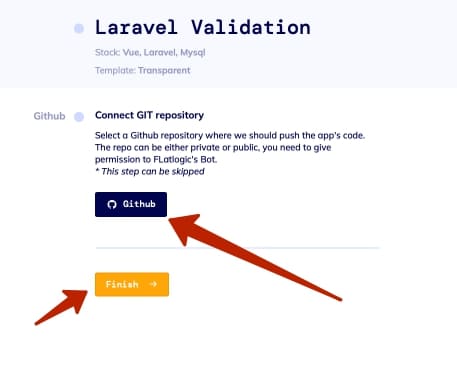
It remains to give permission to access your GitHub repository for Flatlogic Bot and click Finish.
Here is the project:
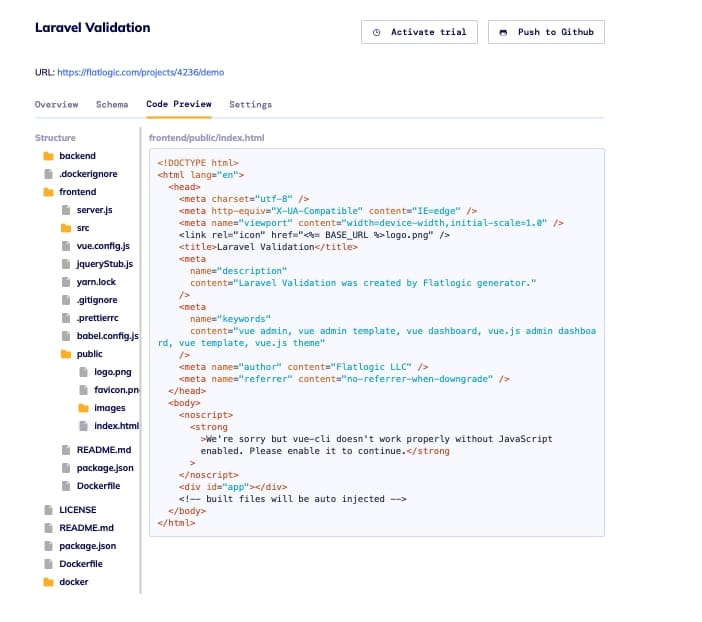
The method described above differs from installing a Laravel project through Composer in that you get a ready-made admin panel, a database, and relationships between database entities.
Save the project to the local computer:
git clone {your github project path}Install the backend:
composer installATTENTION: Your local machine may not match the PHP version. I needed to update my PHP version as the project uses version 7.4
Generating keys:
php artisan key:generate

php artisan jwt:secret
Install Vue js frontend
yarnSo, Laravel Project with Vue frontend has been set up. Later in this article, we will look at how to do Validation in this project. For now, let’s learn the basics. Move on forward.
Creating a View to work on Laravel Validation
Get started with the project which we’ve already created with Composer. Proceed with editing the View file. Open the project in your IDE (I use Visual Studio Code) and find the following file:
resources/views/welcome.blade.phpIn order not to reinvent the wheel, we will use the Bootstrap 5 Library. Go to the following link https://getbootstrap.com/docs/5.1/forms/overview/ Copy the form code, remove everything unnecessary and place it in the file welcome.blade.php
I got this one:
<!DOCTYPE html>
<html lang="en">
<head>
   <meta charset="UTF-8">
   <meta http-equiv="X-UA-Compatible" content="IE=edge">
   <meta name="viewport" content="width=device-width, initial-scale=1.0">
   <link href="https://cdn.jsdelivr.net/npm/[email protected]/dist/css/bootstrap.min.css" rel="stylesheet" integrity="sha384-1BmE4kWBq78iYhFldvKuhfTAU6auU8tT94WrHftjDbrCEXSU1oBoqyl2QvZ6jIW3" crossorigin="anonymous">
   <script src="https://cdn.jsdelivr.net/npm/[email protected]/dist/js/bootstrap.bundle.min.js" integrity="sha384-ka7Sk0Gln4gmtz2MlQnikT1wXgYsOg+OMhuP+IlRH9sENBO0LRn5q+8nbTov4+1p" crossorigin="anonymous"></script>
   <title>Laravel Validation</title>
</head>
<body>
  <div class="container mt-5">
      <div class="row">
          <div class="col">
          <h1>Laravel Validation</h1>
                   <form method="POST" action="users">
                   @csrf
               <div class="mb-3">
                   <label for="exampleInputUserName" class="form-label">Username</label>
                   <input type="text" name="username" class="form-control">
               </div>
               <div class="mb-3">
                   <label for="exampleInputUserAge" class="form-label">Your age</label>
                   <input type="text" name="age" class="form-control">
               </div>
               <div class="mb-3">
                   <label for="exampleInputEmail1" class="form-label">Email address</label>
                   <input type="email" name="email" class="form-control">
                   <div id="emailHelp" class="form-text">We'll never share your email with anyone else.</div>
               </div>
               <div class="mb-3">
                   <label for="exampleInputPassword1" value="password" class="form-label">Password</label>
                   <input type="password" name="password" class="form-control">
               </div>
               <button type="submit" class="btn btn-primary">Submit</button>
               </form>
          </div>
      </div>
  </div>

</body>
</html>
ATTENTION: Notice that I’ve added @csrf inside the form. This is an important thing in Laravel framework security issues, and we will talk about this separately in future articles. In the current case, remember that this is a security token and without it, Laravel will return a 419 server response.
So let’s restart our Development Server and check that everything works.
php artisan serveHint: If you need to stop the Development server in Laravel, press “Control+C”
So, we have done the initial setup: we have the Laravel project installed, we have View and now we can move on to learning 4 Great Methods of Laravel Validation.
4 Great Methods of Laravel Validation
Method #1: Easiest Laravel Validation in Route (God bless)
This method cannot be classed as a great method. In fact, I wanna say that it’s the worst method in the Universe. You shouldn’t use it unless you have no time at all because you are trying to hack NASA. However, I will tell you about it for the simple reason that you must understand how Laravel Validation works from Start to Finish.
Let’s create a route that returns our View(welcome.blade.php) with a form. Open routes/web.php and write a new route:
Route::get('/', function(){return view('welcome');});Moving on forward. If you look in the application controller base class App\Http\Controllers\Controller, you will see that it uses the ValidatesRequests (Illuminate\Foundation\Validation\ValidatesRequests). This trait provides a convenient validate() method for all controllers.
So let’s add this controller to our routes/web.php routing file:
use App\Http\Controllers\ValidationController;And create a route, inside which be used a function with the validation of our form. It all looks like this:
Route::post('/users', function (Request $request)
{
   $request ->validate([
       'username'=>'required|string|min:1|max:100',
       'age'=>'required',
       'email' => 'required|email',
       'password' =>'required|min:8|string'

   ]);
   return $request->input();
});
The validate() method already contains the ready-to-use logic for validation, so we only need to enumerate the values. At the end of this article, we will study in more detail the values that this method offers for validation.
Well, let’s open localhost:8000 in the browser, fill in the fields with data, and click Submit. On the new page, we will see the result of the work.
{"_token":"goUEA5B1V4nrDBp8ee6exjEJ1ePK1Jf19hs54527","username":"Judy Alvarez","age":"18","email":"[email protected]","password":"qwerty"}Ready!
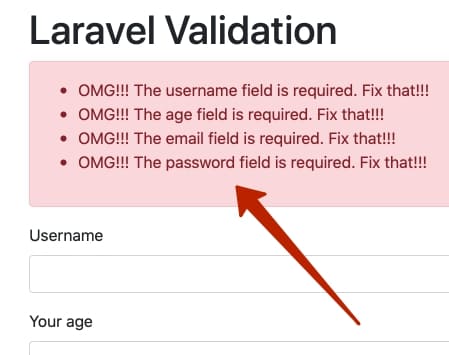
Before moving on to the next chapter, let’s catch errors. It’s very simple. It is enough to enter the {{$errors}} command on the welcome.blade.php page and they will be displayed on the page. Shall we try? It works, but it doesn’t look very good… Does it? Let’s add some logic so that errors are displayed beautifully:
@if ($errors->any())
                   <div class="alert alert-danger">
                       <ul>
                           @foreach ($errors->all() as $error)
                               <li>OMG!!! {{ $error }} Fix that!!!</li>
                           @endforeach
                       </ul>
                   </div>
  @endif
Looks good!
ATTENTION: The $errors variable can be used thanks to the Middleware Illuminate\View\Middleware\ShareErrorsFromSession. If you use this Middleware, the $errors variable will always be available in your templates. This $errors Variable will be an instance of Illuminate\Support\MessageBag.
Method #2: Popular but Flawed; Immediately Laravel Validation in Controller
This method is also not ideal for use, as it violates the SOLID Single Responsibility Principle (SRP). However, I have seen many great Laravel projects that implement validation in this way.
So, let’s create a controller for validation. To do this, enter the following in the terminal command line:
php artisan make:controller ValidationControllerI decided to give a name to my controller ValidationController, – you can give it any name you want, as long as the second word in the name is controller.
Next, open up our controller and create a simple function to display our View(welcome.blade.php)
<?php

namespace App\Http\Controllers;

use Illuminate\Http\Request;

class ValidationController extends Controller
{
   public function showWelcomeBladePHP (){
       return view('welcome');
   }
}
Also, move validation logic from the routes/web.php routes to this controller
public function userValidation(Request $request){
       $request ->validate([
           'username'=>'required|string',
           'age'=>'required',
           'email' => 'required|email',
           'password' =>'required|string'
       ]);
       return $request->input();
   }
This is how a working ValidationController looks:
<?php

namespace App\Http\Controllers;

use Illuminate\Http\Request;


class ValidationController extends Controller
{
   public function showWelcomeBladePHP (){
       return view('welcome');
   }

   public function userValidation(Request $request){
       $result = $request ->validate([
           'username'=>'required|string',
           'age'=>'required',
           'email' => 'required|email',
           'password' =>'required|string'
       ]);
       return $request->input();
   }
}
What happens in this function?
- We get data from $request
- We put data in the validate() function and perform validation
- And finally, we store the result in $result. Awesome!
Now let’s fix the routes in our routes/web.php file
Route::get('/', [ValidationController::class, 'showWelcomeBladePHP']);
Route::post('users', [ValidationController::class, 'userValidation']);
As you can see, now all the validation processing logic has moved from Routes(web.php) to the Controller.
Check how errors are handled:
And how the controller works if there are no errors:
{"_token":"goUEA5B1V4nrDBp8ee6exjEJ1ePK1Jf19hs54527","username":"Johnny Silverhand","age":"156","email":"[email protected]","password":"1234"}Fantastic, isn’t it? Move on!
Method 3: Oskar Winner; Magic Laravel Validation with Form Requests
Continue to develop the validation logic. Now we need a Request. Let’s create new Request using Artisan:
php artisan make:request UserValidationRequestAs you can see I named my Request UserValidationrequest. Let’s investigate what lies inside it (you can find it in the project in the file App/Http/Requests/UserValidationRequest.php):
<?php

namespace App\Http\Requests;

use Illuminate\Foundation\Http\FormRequest;

class UserValidationRequest extends FormRequest
{
   /**
    * Determine if the user is authorized to make this request.
    *
    * @return bool
    */
   public function authorize()
   {
       return false;
   }

   /**
    * Get the validation rules that apply to the request.
    *
    * @return array
    */
   public function rules()
   {
       return [
           //
       ];
   }
}
There are already 2 ready-to-use functions here: rules() and authorize().
Let’s immediately fix the authorize() function so as not to get a 403 server response (we have a different task now and we will not check authorization).
public function authorize()
   {
       return true; //false
   }
Now, let’s transfer the validation logic from our ValidationController controller to the rules() function that is in the newly created UserValidationRequest. This is how our UserValidationRequest now looks like:
public function rules(){
       return [
           'username'=>'required|string|min:1|max:100',
           'age'=>'required',
           'email' => 'required|email',
           'password' =>'required|min:8|string'
       ];
   }
Now the final steps. Let’s go to ValidationController and add the Request we just created:
use App\Http\Requests\UserValidationRequest;That’s all. Now we will validate data using our newly created Request. To do this, it remains to fix the userValidation () function in the controller:
public function userValidation(UserValidationRequest $request){
       $result = $request ->validated();
       return $request->input();
   }
As you can see now, the new request with data first goes to the UserValidationRequest, and only after validation does it get to the Controller. This is a wonderful and accurate way of Validation in Laravel from all sides. And I recommend using it. Even in extreme situations;).
Method #4: Deep Divers and Geeks; Custom Laravel Validation using Laravel Validator
This method can be useful if it is important for your project to handle custom errors. The method makes extensive use of the Laravel Validator facade.
Let’s add it to our controller:
use Illuminate\Support\Facades\Validator;And now let’s make changes to our ValidationController controller:
 public function userValidation(Request $request){
       $result = Validator::make ($request ->all(),[
           'username'=>'required|string|min:1|max:100',
           'age'=>'required',
           'email' => 'required|email',
           'password' =>'required|min:8|string'
       ]);
       if ($result->fails()) {
           return redirect('/')
                   ->withErrors($result)
                   ->withInput();}
       return $request->input();
   }
While this method favors Custom Laravel Validation, I also oppose this method as it goes against the principles of SOLID. And if you don’t want to upset Mr. Robert C. Martin, then don’t use it. Think of how you can change this code so as not to violate the principles of SOLID
Laravel Validation using Flatlogic platform: Form Request
We have already installed our Laravel Project with Vue frontend locally.
Let’s start the backend server
php artisan serve --host=localhost --port=8080Attention: Pay attention to the port. By default, Laravel has a port number of 8000. The project uses port 8080.
Now let’s Run frontend development server:
yarn run start:backend
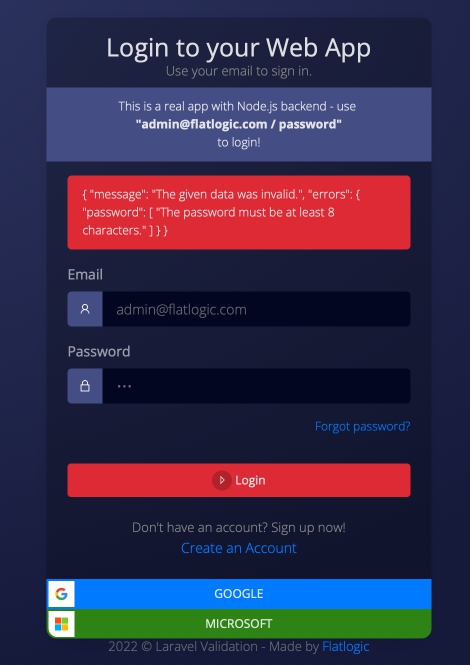
Let’s open it in a browser and visually check the operation of the front-end server on port 3000:
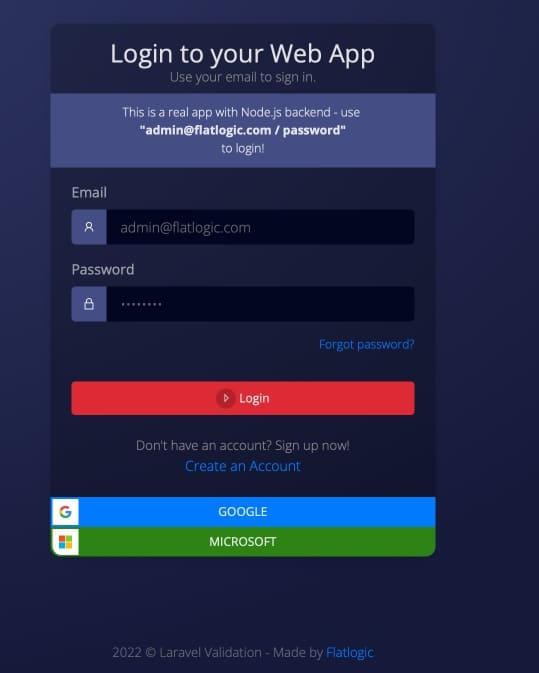
And the backend server on port 8080:
Everything works great! Super!
Earlier in this article, we already learned how to make a Form Request. Let’s put our knowledge into practice. Let’s go to the backend folder and create a new Request for our project:
php artisan make:request UserValidationRequestFamiliar? Then we open the UserValidationRequest and make minor changes to it.
<?php

namespace App\Http\Requests;
use Illuminate\Foundation\Http\FormRequest;
class UserValidationRequest extends FormRequest
{
   /**
    * Determine if the user is authorized to make this request.
    *
    * @return bool
    */
   public function authorize()
   {
       return true;//false
   }

   /**
    * Get the validation rules that apply to the request.
    *
    * @return array
    */
   public function rules()
   {
       return [
           'email' => 'required|email',
           'password' =>'required|min:8'
       ];
   }
}
As you can see, I left only 2 fields for validation here, since in our front-end example there is a ready-to-use form in which only email and password need to be validated.
Next, open our controllers and look for AuthController there (let me remind you that the controllers are in the path backend/app/Http/Controllers/Api).
Let’s add our request to the __construct function:
public function __construct(UserValidationRequest $request)And in namespaces:
use App\Http\Requests\UserValidationRequest;And let’s see how everything works (I commented out all the logic and returned only what our UserValidationRequest returns. As you can see, I returned errors)
public function login()
   {
       // $credentials = $this->request->only(['email', 'password']);

       // if (!$token = auth()->attempt($credentials)) {
       //     return response()->json(['error' => 'Unauthorized'], 401);
       // }

       // /** @var Users $user */
       // $user = auth()->user();
       // if ($user->emailVerified) {
       //     $payload = JWTFactory::user(['id' => $user->id])->make();
       //     return JWTAuth::encode($payload);
       // }

       // return response(['message' => 'user not found'], 404);
       return $errors;
   }
By default, the frontend logic already checks if the email is valid, so I only checked the length of the password and entered a password with 3 characters.
Laravel Validation: How to Create Custom Rule Classes
Let’s dive even deeper and see how to create Custom Rule Classes in Laravel Validation.
Create a rule:
php artisan make:rule IsValidSantasReindeerLet’s open the project and look at the newly created rule. It is located at /app/Rules/IsValidSantasReindeer.php
Creating a validation function:
public function passes($attribute, $value)
   {
      return in_array($value, [
          'Dasher',
          'Prancer',
          'Vixen',
          'Comet',
          'Cupid',
          'Donner',
          'Blitzen',
          'Rudolph'

      ]);
   }
And add a custom message to visually verify that our code work properly:
public function message()
   {
       return 'Wrong Santas Reindeer name:(';
   }
Now let’s make changes in the app/Http/Requests/UserValidationRequest.php file:
use App\Rules\IsValidSantasReindeer;We will check username with new rules. Let’s create an object:
new
IsValidSantasReindeer:
'username'=>['required', 'string','min:1','max:100', new IsValidSantasReindeer],
At the same time, app/Http/Controllers/ValidationController.php looks the same as in the Form Request chapter of this article.
<?php
namespace App\Http\Controllers;
use Illuminate\Http\Request;
use Illuminate\Support\Facades\Validator;
use App\Http\Requests\UserValidationRequest;
class ValidationController extends Controller
{
public function showWelcomeBladePHP (){
return view('welcome');
}
public function userValidation(UserValidationRequest $request){
$result = $request ->validated();
return $request->input();
}
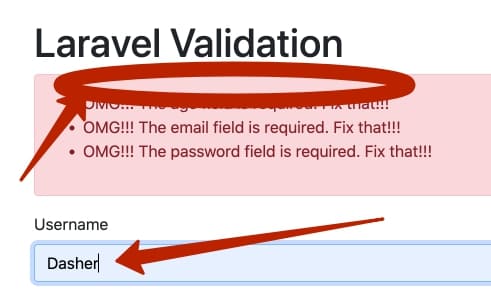
}Checking how the new rule works. Let’s enter the wrong username in the “username” field:

Now we will enter one of the saved names and make sure that the error message is gone:
Fabulous!
Custom Laravel Validation messages
Let’s continue our dive and see how we can create Custom Laravel Validation Messages for our project. It’s actually very simple and I’ll show you how to do it through the previously studied Form Request.
In fact, it is enough to open the Request we created and add the messages () function:
public function messages()
   {
       return
       [
           'username.required' => 'Yeah! Username is required!!!',
           'age.required'  => 'Yeah! This field is required!!!',
           'email.required' => 'Yeah! Email is required too!!!',
           'password.required'=>'Yeah! Password is required!!!'
       ];
   }
As you can see, I changed the Required properties for the ‘username’, ‘age’, ’email’, ‘password’ entities. In exactly the same way, you can write your Custom messages for other properties. Let’s check if everything works correctly:
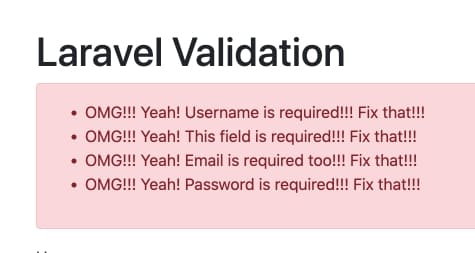
Yes! Everything is fine! Great!
Most Popular validation Rules in Laravel
To conclude our guide, let’s take a quick look at the most popular Validation Rules in Laravel.
#acceptedThis rule returns true if the values are “yes”, “on”, 1, or true
I recommend using it when you check if the user has agreed to the terms of use, or when the user confirms whether he is 18 years old.
#after:dateA great rule of thumb if your user has to choose a time for a consultation. In this way, you will check that the user has not booked time for yesterday. Great rule. Here is an example of its use:
'consultation_date' => 'required|date|after:tomorrow'#bailA great way not to load your server. Abort further validation checks if at least one property fails validation.
#before:dateThis rule is great to check if the user was born later than today (unless you are creating a resource for time travelers).
#between:min.maxYou can check if the user is trying to withdraw from the account more money than he has and less than the minimum amount that can be withdrawn
#confirmedUsed when you need to confirm a password
#digits:valuenumerics are available for validation.
#integerA very common rule when working with eCommerce. Check if the input is an integer.
#emailThe most used rule. Here, as it is not difficult to guess, it is checked whether the user has entered an email.
#fileChecking if a file is loaded
#imageIt’s also a fairly common rule. Checks if the file is an image. The following formats are supported: (jpg, jpeg, png, bmp, gif, svg, or webp).
#ip | #ipv4 | ipv6Whether the data is ip, ipv4, or ipv6 format is checked accordingly.
#min:value | #max:valueThese rules will prevent the novel by Keith C.Paine “Wow” and the novel by Marcel Proust “Remembrance of Things Past” from appearing in your database.
#passwordPassword;)
#requiredOne of the most common rules. It will check, among other things, that there is no empty String, uploaded file with no path, or empty array.
You can learn more about validation rules here.
Conclusion
Today we have learned some great ways for Data Validation in Laravel MVC framework. We have learned Laravel Validation In Route, Laravel Validation in the Controller, Validation with Form Requests, and Custom Laravel Validation using Laravel Validator. We talk about Custom Rule Classes, Custom Laravel Validation Messages, and ready-to-use Rules that you can use for validation of your Laravel projects.
In addition, you have learned how easy it is to start a Laravel Project with Vue frontend and ready-to-use Admin dashboard for FREE using Flatlogic Platform. By deploying a project using the Flatlogic Platform, you initially save about 500 hours of development (time of the designer, frontend, and backend engineers) or $20,000.
Use the promotional code VALIDATION50 and get a 50% discount for 1 month of the subscription. It has never been so easy to add a database and hosting to your project! Incredible! And it’s just a few clicks away!
We wish you good luck in developing your Laravel projects, and in order not to miss the news from us, subscribe to our YouTube channel and our email newsletter. We add to the mailing list not only news about Flatlogic Platform and educational articles but also new coupons and discounts for our products.
Cheers!