Introduction
We hope that you will find this article really helpful. And not only because we intend to talk about the theoretical side of React chat apps, their importance, and usage, but also because we are going to discuss the practical creation of such apps with the help of Flatlogic AI web app builder – an amazing new tool, aimed at easing the tiresome process of creating apps from scratch.
What You Need to Know About React Chat Apps
Let’s start with a traditional question: “What is a React Chat App?”. And the answer to this question is quite simple: a React chat app is an application, whose primary purpose is to provide customers and/or clients with an opportunity to communicate with project representatives to help them solve any issues they might have with the project. Moreover, chat apps allow you to keep in touch with your clients in other ways, like providing them with your project’s news, updates, and any other information you deem significant. Another quite important feature of chat apps is the possibility of digitally storing your clients’ data such as names, addresses, messages, etc. They can also be used within your project as a tool to centralize all internal team communications and data.
Why Your Project Needs React Chat App
Such applications are in high demand nowadays, as due to the overall number of businesses and projects present on the market, the client-business paradigm (or demand-supply paradigm in the broader sense) tends to side more with the client. This means that it is more important for a modern business to create a harmonious relationship with a customer than vice versa, because their wishes and needs could be satisfied by a company’s competitor more easily than the other way round if a client has any dissatisfactions with the current company. Thus, maintaining a strong relationship between you and your client is becoming more and more important, and this includes providing live support. Businesses and projects that are unique and have no competitors or alternatives might not have such a problem in the short run, although we should stress that the problem is not only in the short run. The reason for this is the simple fact that it is always a matter of time before a unique product acquires competitors and alternatives. That is why sustaining good relationships is essential. Luckily, this goal can be easily accomplished via chat apps.
So, now, having shown you the need for a chat app for your current and future projects let’s set out why we advise you to create it in React. And, the short answer would be that chat apps based on React.JS are fast, scalable, and easy to maintain for developers. Don’t get us wrong, there are other programming languages that are also up to the job, but we suggest, nonetheless, using ReactJS, as there is no need to choose a longer and windier road. And that’s not to mention the fact that you and your developers can simplify even that task and use Flatlogic. And that brings us to our next topic.

How to Create Your Own React Chat App
In this part of the article, we will discuss two ways of creating React Chat Apps:
- Writing its code from scratch
- Using Flatlogic’s Full Stack Web AI Application Builder
Let’s start by looking at the first method. There are two major steps you have to undertake in this case, each having a number of substeps:
- Creating and Coding the Backend
- Creating and Coding the Front-end
By creating a React Chat App using this method, you will also secure all of the information and data in your Chat App with E2E Encryption. But let’s get more specific and look more closely.
Step 1. Creating and Coding the Backend
For the first part of this step, which is creating the backend, we use tools such as the Express framework and Node.js. We use them with the purpose of providing real-time, two-way communication between the backend server and the frontend.
The second part of this step, which is coding the backend, is divided into several substeps, the first of which is creating a server directory and its browser. The code will look as follows:
mkdir chatbackend
cd chatbackend
After that, the creation of the package.json is needed. To do that, insert the following piece of code into the terminal:
npm init –yThis way you get package.json.
Then you should create separately:touch dummyuser.js
Add to the dummyuser.js file:
const cusers = [];
function joinUser(id, username, room) {
  const puser = { id, username, room };
  cusers.push(puser);
  console.log(cusers, "users");
  return p_user;
}
console.log("user out", cusers);
function getCurrentUser(id) {
  return cusers.find((puser) => puser.id === id);
}
const index = cusers.findIndex((puser) => puser.id === id);
if (index !== -1) {
  return cusers.splice(index, 1)[0];
}
module.exports = {
  joinUser,
  getCurrentUser,
  userDisconnect,
};
touch server.js
Add to the server.js file:
const express = require("express");
const app = express();
const socket = require("socket.io");
const color = require("colors");
const cors = require("cors");
const { getCurrentUser, userDisconnect, joinUser } = require("./dummyuser");
app.use(express());
const port = 8000;
app.use(cors());
var server = app.listen(
  port,
  console.log(`Server is running on the port no: ${port} `.green)
);
const io = socket(server);
io.on("connection", (socket) => {
  socket.on("joinRoom", ({ username, roomname }) => {
    const puser = joinUser(socket.id, username, roomname);
    console.log(socket.id, "=id");
    socket.join(puser.room);
    socket.emit("message", {
      userId: puser.id,
      username: puser.username,
      text: `Welcome ${puser.username}`,
    });
    socket.broadcast.to(puser.room).emit("message", {
      userId: puser.id,
      username: puser.username,
      text: `${puser.username} has joined the chat`,
    });
  });
  socket.on("chat", (text) => {
    const puser = getCurrentUser(socket.id);
    io.to(puser.room).emit("message", {
      userId: puser.id,
      username: puser.username,
      text: text,
    });
  });
  socket.on("disconnect", () => {
    const puser = userDisconnect(socket.id);
    if (puser) {
      io.to(puser.room).emit("message", {
        userId: puser.id,
        username: puser.username,
        text: `${puser.username} has left the room`,
      });
    }
  });
});
Now, onto substep #2, which is all about creating dependencies and providing coding needed for the user’s ability to be added to an empty room by creating an array of empty users. It also empties the array when the user disconnects.
To create dependencies, do the following:
npm i socket.io express cors colors
npm i -D nodemon
Create node_modules
Now, we get to substep number three. Its main purpose is to create a server file, which is used for backend connection initialization and users-room communication provision. In order to complete this substep, do as follows:
Now, you need to set the following listeners:
· joinRoom
This one is needed to enable a new user to join the chatroom, as it provides a greeting message for the joining user as well as a notification about the user joining everybody else in the chatroom.
· chat
This one is crucial as it handles the actual process of sending and receiving messages. It also sends an informational message about the user leaving the chat if such a situation occurs.
This finalizes our active work on the backend side of the chat app.
Step 2. Creating and Coding the Front-end
For this step we will use React, Redux library, the socket.io-client, as well as a tool, known as aes256, which helps in the above-mentioned encryption, and, for that matter, decryption of information and data, contained within the chat.
Our first substep in this case is Creating the Front-end, which is all nice and simple. The final folder structure of the Front-end should look this way:
· chartfrontend
>   node_modules
>   public
·  src
§  chat
§  chat.js
§  chat.scss
·   home
§  home.js
§  home.scss
·   process
§  process.js
§  process.scss
·  store
·  action
§  index.js
·  reducer
§  index.js
§  process.js
o   _global.scss
o   aes.js
o   app.js
o   app.scss
o   index.js
{}  package-lock.json
{}  package.json
Our second step is Coding the front-end. This part of the process has quite a number of steps, and, as the front-end side of the coding process is more creative-based than the backend one, we will only describe the general order of the substeps, without giving you the particular lines of code.
So, substep number one would be creating a client folder for our React App, as well as installing the dependencies necessary for the app to actually run.
The second substep would be to:
§ make modifications in your /src/index.js file in order to help the implementation of reducers in the react app;
§ after that, the creation of a file /store/action/index.js, which is needed for the definition of action objects that allow us to avoid writing the object every time we need it;
§ the next thing you would need to do is to create the /store/reducer/process.js, which would act as the reducer in the app, meaning that it would take the current state of the new action objects and return them to their new states;
§ then, get down to the creation of the /store/reducer/index.js file in order to import the newly created reducers and address the previously created action object;
§ and, finally, add redux to your React App and create the process action.
All of these actions are needed to ensure the sending and receiving of the incoming and outcoming messages through the aes.js file, and, correspondingly, the encryption and decryption of the messages.
After all the above-mentioned substeps are completed, we come to substep number three, which is responsible for the creation of route fetches for the user and room names. After that add styling of your liking for App.js.
The fourth substep constitutes coding the /home/home.js file, which acts as the homepage of the app, where the users write down their usernames and room names that they would like to join. It is absolutely necessary to code in the socket.emit(“joinRoom”) function for the joinRoom function to be defined in the backend, and, subsequently, give users an opportunity to be added to the room and be greeted by the welcome message, which we mentioned earlier. After that, add stylings of your choosing to the home.js file.
The next substep, which would be the fifth one, is coding the /chat/chat.js file, which loads as the user joins the room. Basically, this is the main page of the chat, where users can chat with each other using the chatbox. After that, add stylings of your choosing to the chat.js file.
Substep number six is the creation of the aes.js file that is our encryption/decryption messages.
After that, we come to the seventh substep, which is creating the /process/process.js file, responsible for the display of the secret key, as well as encrypted and decrypted messages on the right side of the chat room. Then, add the stylings of your choosing to this file.
Finally, run the server and the app you’ve got to test the final app.
And that’s how you create a React chat application, which is also empowered by the E2E encryption. And while this is a pretty quick and easy process, there is a way to make it even more effortless using a web AI app builder. It is more than just a useful tool, but the apogee of more than 7 years of Flatlogic’s combined expertise and professional knowledge in one exceptionally made package. It allows you to create fully functioning and ready-to-use apps with just three simple actions:
- Choose your chat app’s stack:
React, Vue and Angular as front-end versions, as well as Node.js as a backend option and PostgreSQL/MySQL as database options; - Define a database scheme;
- Choose the styling and design for your chat app.
Then you press the “Generate app” button and watch the magic happen by itself. So, even though the process of creating a React Chat App is quite simple even of itself, we highly recommend creating your next project’s chat app using the Flatlogic platform to make an effective application in a jiffy.
Creating React Chat Apps with Flatlogic’s Full Stack AI Web Application Generator
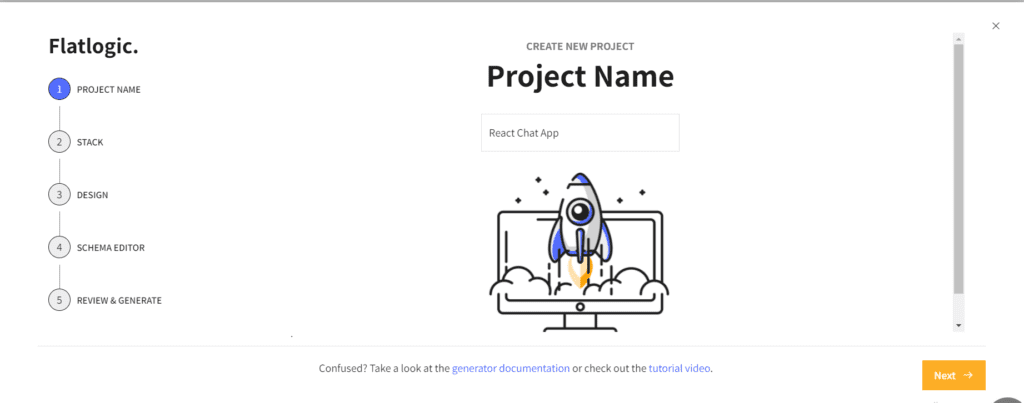
Step №1. Name the Project
Every great story starts with a title and every great React app starts with a name. Start the process of quick and effortless React Chat App creation by choosing a name for the project.
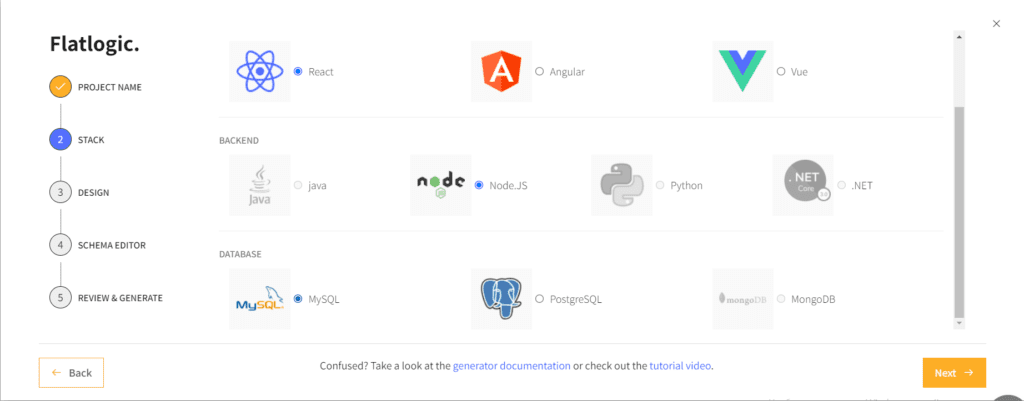
Step №2. Choose Your Stack
During this step, you metaphorically put together a skeleton for your app by choosing its stack, including the front-end, back-end, and database sides of the question.
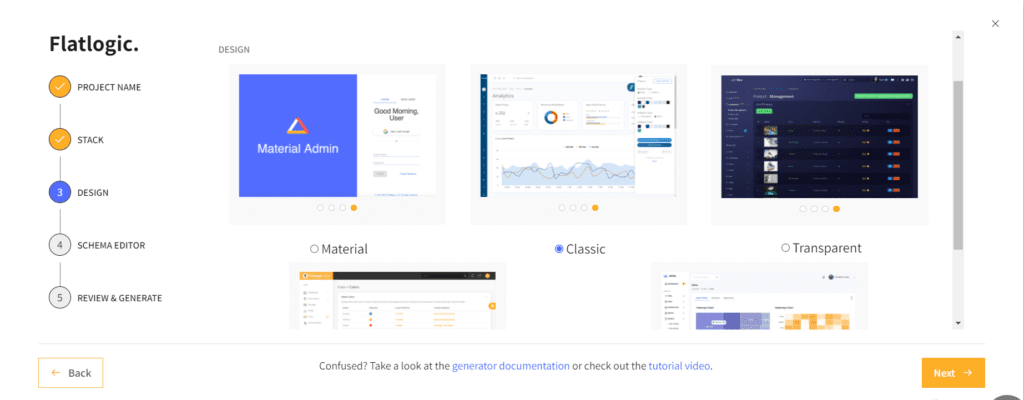
Step №3. Choose your design
Once your skeleton is metaphorically put together, you are all set to add beautiful skin to it, by choosing a stunning design from a number of ready-made and ready-to-use variants.
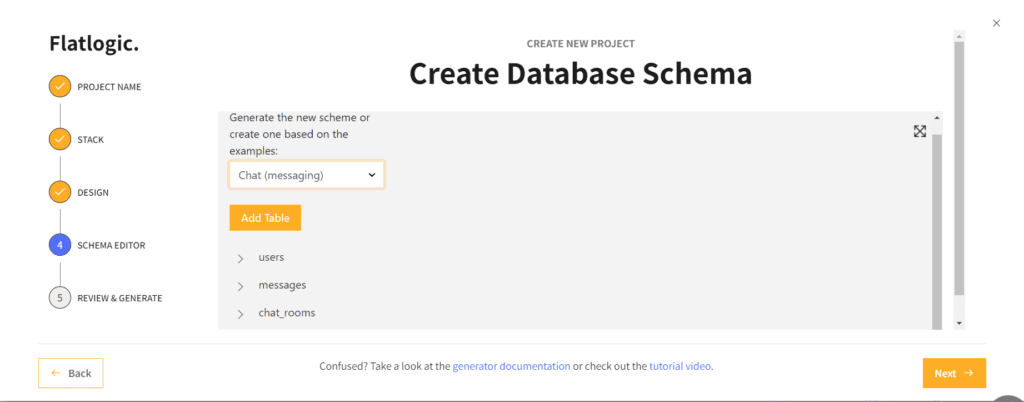
Step №4. Create a Database
During this step, to continue the analogy from the previous steps, put some serious muscle on the skelly. And what we mean by that is creating the database schema for your React Chat App. And if you don’t feel like doing it yourself, Flatlogic’s platform has the ready-to-use schema for the Chat apps. Now choose the database you need from the list. What is also great here is the ability to tinker with the ready-made schemas, so they would be more fitting for your needs.
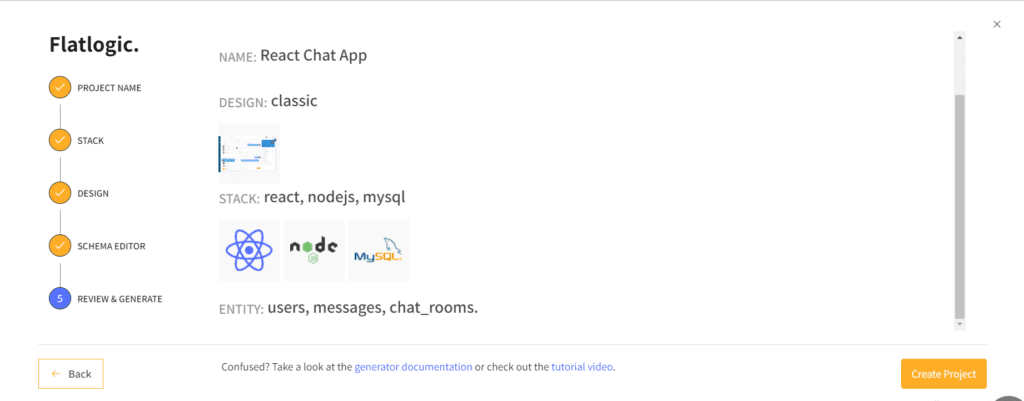
Step №5. Review and Generate Your App
What you need to do now is simply review your choices for the app and press the “Create Project” button, so Flatlogic’s Full Stack Web App Builder would work its magic. After a few short minutes, you will have on your hand a fully working React chat application.
Examples of Well-Made React Chat Apps
In this part of the article, we would like to share with you 5 examples of React Chat Apps that we find quite well made and explain why we think so.
Example №1 – Simple chat window thing built in React by Joshua P. Larson
We consider this React Chat App to be well-made as it shows that it is not always necessary to have lots and lots of flashy features to be considered a good, reliable addition to your project. Slow and steady or, more appropriately to the occasion at hand, nice and simple, wins the race.

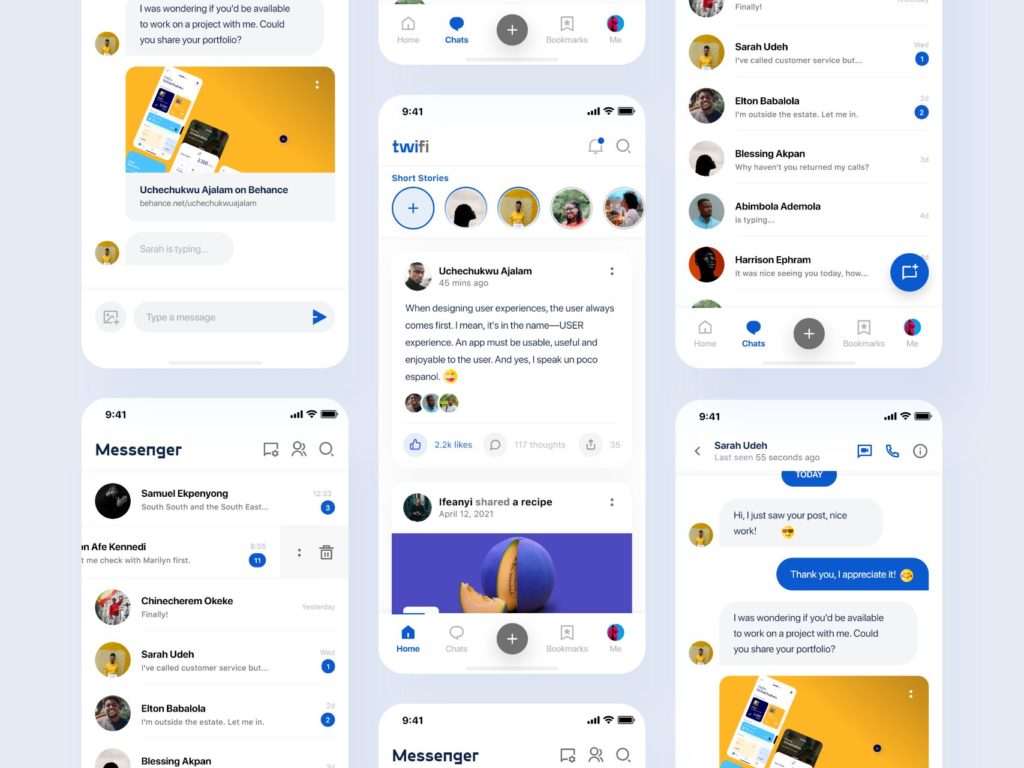
Example №2 – Chat Application by DanLowo
This one is a beautifully made and stylings-heavy React App, somewhat reminiscent of a better-made Instagram Direct Messages. We include it into the list of our examples as a way to convey the importance of making your chat app visually appealing to the final user. It also should be mentioned that Flatlogic’s Full Stack Web Application Generator allows you to choose the design of the app you create from a list of eye-catching variants.
Example №3 – A React-based chat app using chatengine.io Rest API
The React Chat App is on the list for features such as group creation and Google Account sign-in. This particular app also serves quite a noble purpose – giving people a platform to share their worries and thoughts with anyone willing to listen on an anonymous basis. So, to have a pure goal and for killer features on our example list it goes!

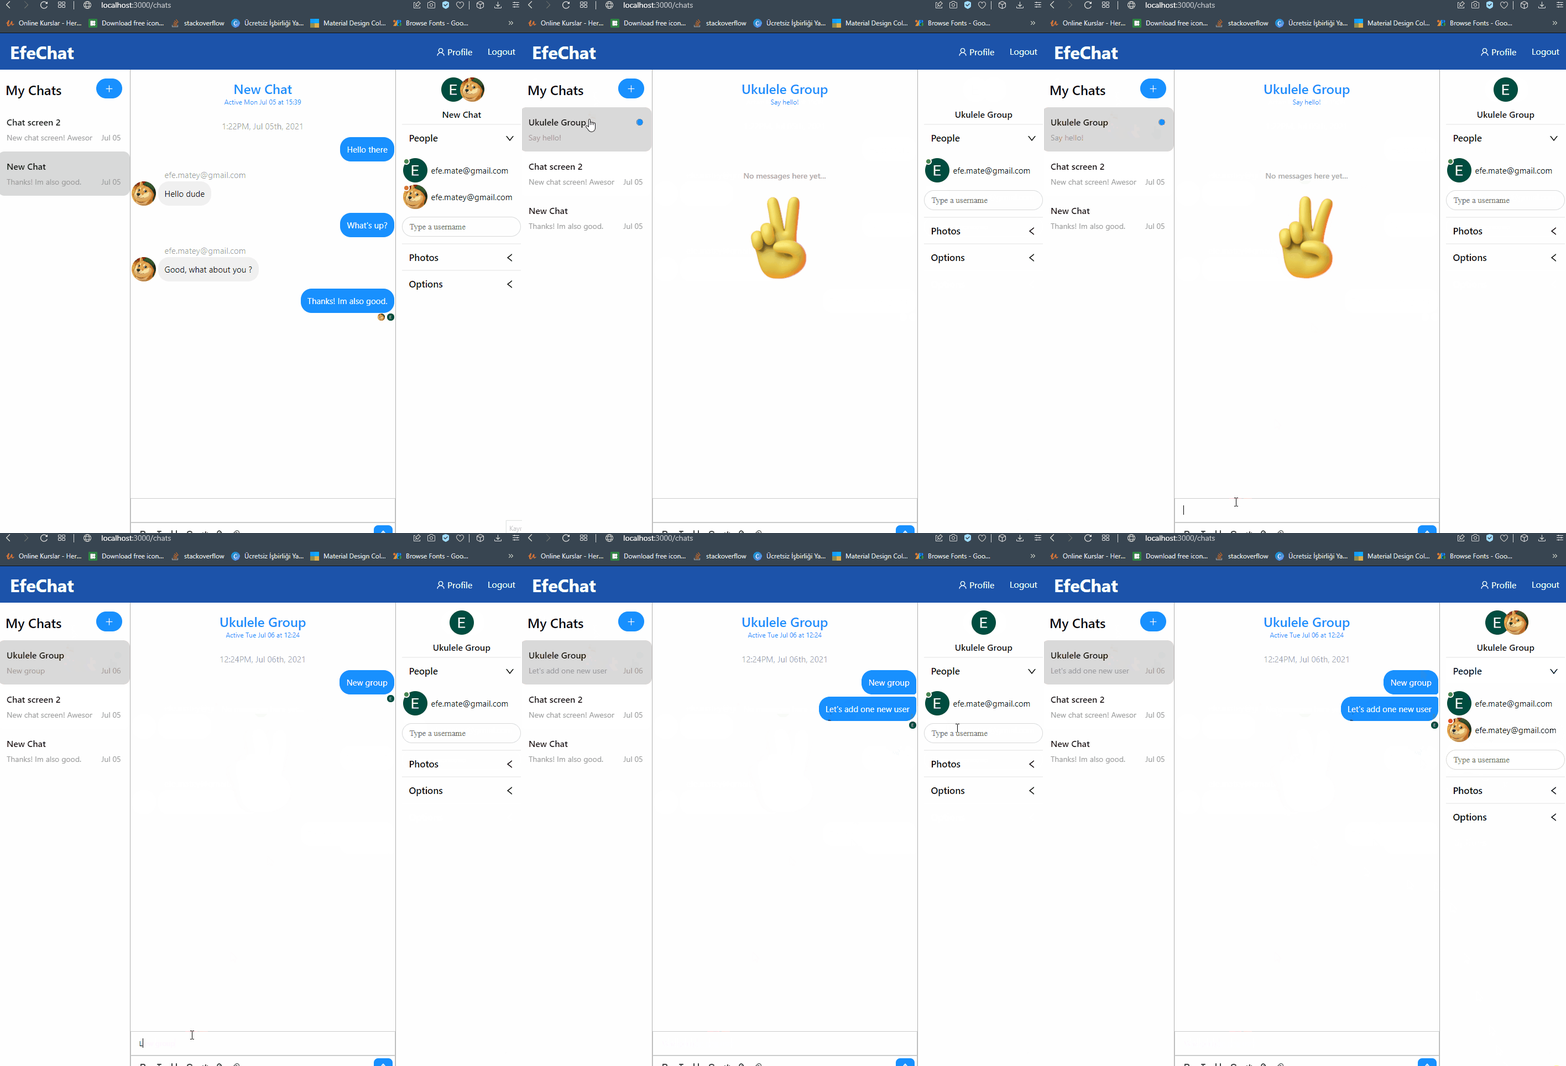
Example №4 – EfeChat by Alper Efe Şahin
We felt the need to add this example to our list as a way of conveying the message of simplicity. Mainly, the simplicity of usage the end-user should have while using your React Chat App. And EfeChat covers this point easily, as its features are quite simple and intuitive – features the presence of which a user might not notice. But trust us, the lack of these two features would be most visible for the user.
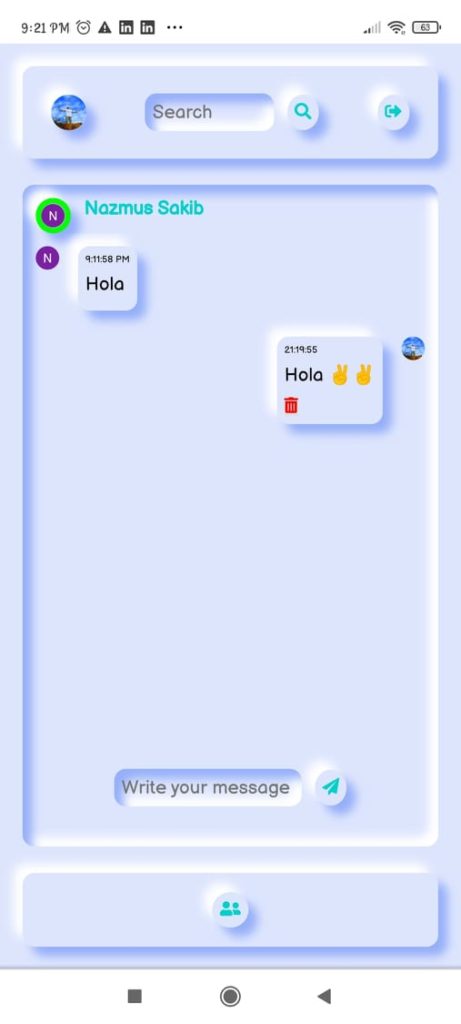
Example №5 – cute-chat by Asif Azad
And we would like to finish our list with cute-chat – a simplistic, yet stylish in its own right chat, that brings us back to 2000’s chats like ICQ with its overall design. But that is not the main idea behind putting it on this list. That would be the necessity of making your React Chat App smartphone-adapted, just like cute-chat, as most of today’s internet traffic is coming from smartphones, rather than computers.
Conclusions
Let’s reiterate now a couple of important points:
- If you want your business to have more opportunities to succeed, it is important to have well-developed communications with a client, as well as many ways of communicating with them. That is why the creation of your own chat app and its subsequent insertion into your project would rarely, if ever, by a step in the wrong direction;
- Building your chat app on React is a fast, efficient and scalable way of creating chat apps coding language-wise. It is even more efficient and faster to use Full Stack Web Application Builder for that purpose.
And that is all for today. We hope that you will find this article really helpful and useful. So, have a good day and, as always, feel free to read more of our articles.
Comments