Say whatever you will about the world of app creation, but there is no denying that it is exceptionally vast and contains practically endless possibilities within itself. And you don’t have to go that far, for example, supporting that claim. Just think of any situation in life that doesn’t have an app aimed at helping to deal with it. Chances are you will not find such a situation. If you, nonetheless, manage to find it then, firstly, kudos to you and your imagination, and, secondly, that might be an opportunity for you to create a needed app. But we digress.
What is important here is the fact that the vastness of possibilities the world of app creation provides is what allows you to enter it seamlessly. And, even more than that, it allows you to create great life-improving applications and significantly improve your finances as well. Now that we are all on the same page about why you should try and create an app at all, let’s take a look at how to create it from two points of view: a theoretical and a practical one.
Reasons to create your apps on React
Let’s begin with the theoretical side of the question. There are many ways to create an app, ranging from Xamarin and AppInstitute to the main hero of this article – React. Don’t get us wrong, this is not a biased opinion, each tool has its advantages (and disadvantages, to be completely honest), but out of all of them React stands out for a number of reasons. Let’s give them a quick rundown:
· React is tried and tested. As React was released in long-gone 2013 and, even more importantly, has improved immensely since then, it has proved its versatility and longevity. Moreover, some of the biggest and the baddest web and mobile apps, such as Facebook, Instagram, and Discord to name but a few, are made on React. So, you can rest assured that your app won’t be React’s first rodeo and it will be more than to create a worthwhile app in the hands of a capable developer.
· React is JavaScript-based. In its essence, React is an open-source JavaScript library. So, there is no need to learn new programming languages, as chances are that you or someone in your team is already able to write in JavaScript.
· React is scalable. Created by Facebook, React can support humongous projects. This can be really useful if you plan to create a great big app or plan to expand your project in the future.

· React’s code is reusable. Being an open-source JavaScript library, React allows for code components reusage. It saves time and speeds up the app development process tremendously. This aspect of React will come into play if you plan on creating multiple applications or if you already have previous apps, with components you would like to introduce into your current project.
· React has an enormous community. We all need a little help from time to time and seasoned React developers are no exception to this. The React community are great problem solvers who will be able to help you crack a tough issue, minimizing the delays in the development process.
As you can see, React has its fair share of advantages, which really consolidates its position on the market and in the hearts of many a developer. And those hearts also include ours and, hopefully, yours in the future. Now, let’s take a look at how the actual process of creating an app on React goes with a practical example.
Tutorial on Manual React App creation
In this example, we are going to create a simple React App with the help of Create React App and three other tools that will be required to complete the task. They are:
· Node.js – an open-source back-end JavaScript runtime environment, needed for Create React App to function;
· The npm package manager, version 5.2 or newer;
· And a code editor. The one we are going to use in this example is Visual Studio Code.
The first step – Installing Create React App
In order to install and subsequently use the Create React App, we open the terminal/command line on our computer and use the npx tool. The latter gives you the ability to use the create-react-app package without the need to install it on your computer and ensures the usage of the latest Create React App version. So, to boot up Create React App, use the following line of coding in your terminal/command line:
· npx create-react-app awesome-react-app
Immediately after that, the aptly named «awesome-react-app» folder will appear with all of the packages it requires auto-installed. After that, the first step is complete.

The second step – The Project Structure Review
Now, it is time to take a look at the structure of our project. Ideally, it should look like this:
Let’s have a quick rundown of the elements contained within awesome-react-app.
· README.md is a file on the Markdown language, which contains lots of helpful tips and links to learn Create React App.
· node_modules is a folder, no comma containing all the dependency-related code that has been installed by Create React App. Leave it be and don’t go into this folder.
· package.json is “The Heart” of any project made with Node. It manages all the dependencies in the node_module folder, as well as all the scripts needed to run our awesome app.
· The .gitignore file is needed to exclude files and folders from the Git tracking.
· The public folder is used to store all the static assets of our React App, like images, svgs, and fonts, etc.
· And, last but not least, the src folder. This one is quite important, as it contains all of the source code of our app. It is also the place where we mostly work while building a React App.
Now that we know what our project contains, it is time to undertake the third step.
The third step – Running the React Project
We start by dragging our project into the code editor and running the following command:
· npm start
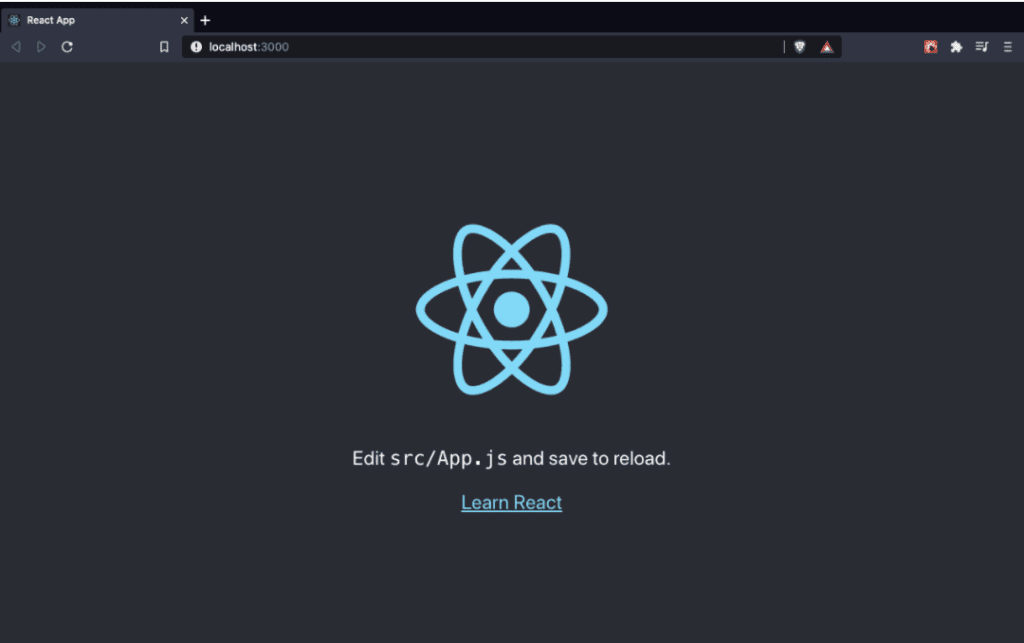
This command will open a new tab with our app in the computer’s default browser on localhost:3000. And, as we see, it already has some content, as in the picture below:
Now we can get into the src folder, where all of this app code is contained. Here we can change and modify the code to suit our purposes and goals. At this point the code will look like this:
Let’s change a couple of things here and there. For example, let’s remove the p and a tags, and add an h1 element, renaming it into the “React Posts Sharer”. After these modifications this piece of coding will look like this:
After the changes are made, we can press the Command/Ctrl + S combination to immediately see the updates made, like in the picture below, and move on to the fourth step.
The fourth step – Running Tests with the React Testing Library
The Create React App tool is equipped with a built-in testing device, called React Testing Library and can be run with the following command:
· npm run test
But if we run the test at this stage, it will fail due to the changes made in the previous step, the main reason being the loss of a link element, which was changed into a title one. Thus, we need to make the small adjustments listed below:
The fifth step – Changing the App’s MetaData
React Apps work by implementing quite a simple concept – the package ReactDOM renders the application by attaching it to an HTML element with a ‘root’ id value. We can find this element in the public/index.html file:
As we can see in the code above, our entire React App is attached to the HTML page via the div with the root id. And here is where our metadata comes into play, as by changing it in the head tags we are effectively telling search engines and potential users about our React App specifically.
Now that this app differs from others a little bit more, we can go on to the sixth step.
The sixth step – Working with Images and Other Types of Assets
It is quite likely that your project will include some types of assets and we bet on images. So, to work with them we need to look inside our App component:
Having cleared that up, we can go to the seventh step.
The seventh step – Installing Dependencies
First off, install the axios dependency in order to make requests to get the posts inside our illustratory post sharing React App. To do that we are going to run the following command:
· npm install axios
Secondly, after the installation is complete, we are going to add it to the node_module folder of the app. When that is done, we need to review all the dependencies directly installed within our app’s package.json file in order to ensure that the axios dependency has been added to the right section:
If all good, we can move on to the eighth step.
{
"name": "awesome-react-app",
"version": "0.1.0",
"private": true,
"dependencies": {
"@testing-library/jest-dom": "^5.11.4",
"@testing-library/react": "^11.1.0",
"@testing-library/user-event": "^12.1.10",
"axios": "^0.21.1",
"react": "^17.0.1",
"react-dom": "^17.0.1",
"react-scripts": "4.0.2",
"web-vitals": "^1.0.1"
}
}
If everything is dandy, we can move on to the eighth step.
The eighth step – Importing components
There is no particular need to write all of our code inside the App component, as we can create a separate component that will be able to fetch and display the data needed at any given moment. We will create this component inside the src folder under the Posts name, and, in turn, put within it the Posts.js file.
In order to fetch the posts we need, a request from JSON Placeholder should be made, after which we will put them in a state ‘posts’ variable and map over them, so their titles and bodies:
   // src/components/Posts.js

import React from "react";
import axios from "axios";

function Posts() {
const [posts, setPosts] = React.useState([]);

React.useEffect(() => {
axios
.get("http://jsonplaceholder.typicode.com/posts")
.then((response) => setPosts(response.data));
}, []);

return (
<ul className="posts">
{posts.map((post) => (
<li className="post" key={post.id}>
<h4>{post.title}</h4>
<p>{post.body}</p>
</li>
))}
</ul>
);
}

export default Posts;
Now the fetching and returning of post data from our Posts component are secured. But we still need to display it in our app. Import it into the App component to make it secure. So, we go back to the components folder of App.js and get the Posts component from Posts.js. Now we can place the Posts component under our header:
  // src/App.js

import Posts from "./components/Posts";
import "./App.css";

function App() {
return (
<div className="App">
<header className="App-header">
<img src="/logo.svg" className="App-logo" alt="logo" />
<h1>React Posts Sharer</h1>
</header>
<Posts />
</div>
);
}

export default App;
And that allows us to stop thinking about the eighth step and think about the ninth one.

The ninth step – Styling React App with CSS
Style and design of the app are important. So, it is very helpful that the Create React App comes with pre-installed CSS support. But we are more than welcome to improve it within the App.css file that can be found inside src. For example:
/* src/App.css */

.App {
text-align: center;
margin: 0 auto;
max-width: 1000px;
}

.App-logo {
height: 40vmin;
pointer-events: none;
}

.App-header {
margin: 0 auto;
display: flex;
flex-direction: column;
align-items: center;
justify-content: center;
font-size: calc(10px + 2vmin);
}

li {
list-style-type: none;
}

.post {
margin-bottom: 4em;
}

.post h4 {
font-size: 2rem;
}
Styling the app, in general, can be made in the index.css file. There, we can add additional priorities. For example, let’s make the background of our app dark and its text white by the following lines of code:
/* src/index.css */

body {
background-color: #282c34;
color: white;
margin: 0;
font-family: -apple-system, BlinkMacSystemFont, "Segoe UI", "Roboto", "Oxygen",
"Ubuntu", "Cantarell", "Fira Sans", "Droid Sans", "Helvetica Neue",
sans-serif;
-webkit-font-smoothing: antialiased;
-moz-osx-font-smoothing: grayscale;
}
Now that we are happy with the styling of our app, we can finally get to the tenth and final step of your manual React App creation process.
The tenth step – Building and Publishing the React App
This step is quite easy and enjoyable as we simply need to build our React App to ensure that its size will not affect its productivity. In order to do that we run the build command:
npm run buildAs a result, we will get the output, similar to this:
· Compiled successfully.
File sizes after gzip:
46.62 KB build/static/js/2.1500c654.chunk.js
1.59 KB build/static/js/3.8022f77f.chunk.js
1.17 KB build/static/js/runtime-main.86c7b7c2.js
649 B build/static/js/main.ef6580eb.chunk.js
430 B build/static/css/main.5ae9c609.chunk.css
And everything is good and proper, we can finally run our built React App by using the serve npm package:
npx serveThis command will start our React App, ready to be used or published on the web or deployment services. And this concludes the process of creating a web app from scratch, which, as you can see, is not an inherently difficult process by any stretch. But it is always tempting to ease your work even more. And we can show you how to create any web app faster in our video guide.
Simplifying the process with Flatlogic’s Full Stack AI Web App Generator
What do we mean by simplifying the process as a CMS? With the help of Flatlogic’s Full Stack AI Web App Generator, you can do it in a jiffy. Here is a guide video made by our CTO, Alexey, on how to make a React app step by step:
Step №1. Choose your projects name
Any good story starts with a title, any good React App CMS starts with a name. So, summon all of your wit and creativity and write your project’s name into the fill-in bar in Flatlogic’s Full Stack Web AI App Generator.
Step №2. Select your React App’s Stack
At this step, you will need to choose the frontend, backend, and database stack of your app. And, to correlate with our illustrative React App, we will choose here React for the frontend, Node.js for the back-end, and MySQL for the database.
Step №3. Choose your React App’s CMS Design
As we’ve already mentioned, design is quite important. So don’t shortchange yourself in such a joy as a beautiful design for your app’s CMS. Choose any from a number of colorful, visually pleasing, and, most importantly, extremely convenient designs Flatlogic’s Full Stack Web App Generator presents.
Step №4. Create your React App’s Database Schema
Even such an important step as this one is nice and easy with Flatlogic’s Full Stack Web App Generator, as you can choose from and build upon a number of database schemas. And as our illustrative React App was a blog-like one, simply pick the pre-made “Blog” option and go forward on your merry way to the next and final step of this seamless CMS creation process.
Step №5. Review and Generate your React App’s new CMS
In the final step, just to make sure everything is as you want it to be, you can review all of the previously made decisions and click the “Create Project” button. After a short time to generate, you will have at your fingertips a beautiful and fully functional CMS for your React App. Voila! Nice and easy!

Conclusion to have
Today we took a small, but important glimpse into the fascinating world of React App creation. And there are a couple of conclusions:
· App creation is an immense and breathtaking process, which can allow you to create something beautiful and needed;
· React is a great tool to create React apps;
· And the process of creating React apps can be easy and satisfying. Especially when it comes to creating its CMS with the help of Full Stack Web App Generator.
So, don’t deny yourself the pleasure of React App creating. Be the artist, the inventor, and the life-improver in one beautiful package. Also, don’t deny yourself the pleasure of reading up on more of our articles, and have a nice day!
Comments